Blender Course III: Rendering Static Images and Animations Programatically Using Blender Scripts
Introduction: showing scripting screen in GUI
Let’s open any Blender file, like our template file, and let’s fine-tune it a little bit; for example, by changing the main object’s position.
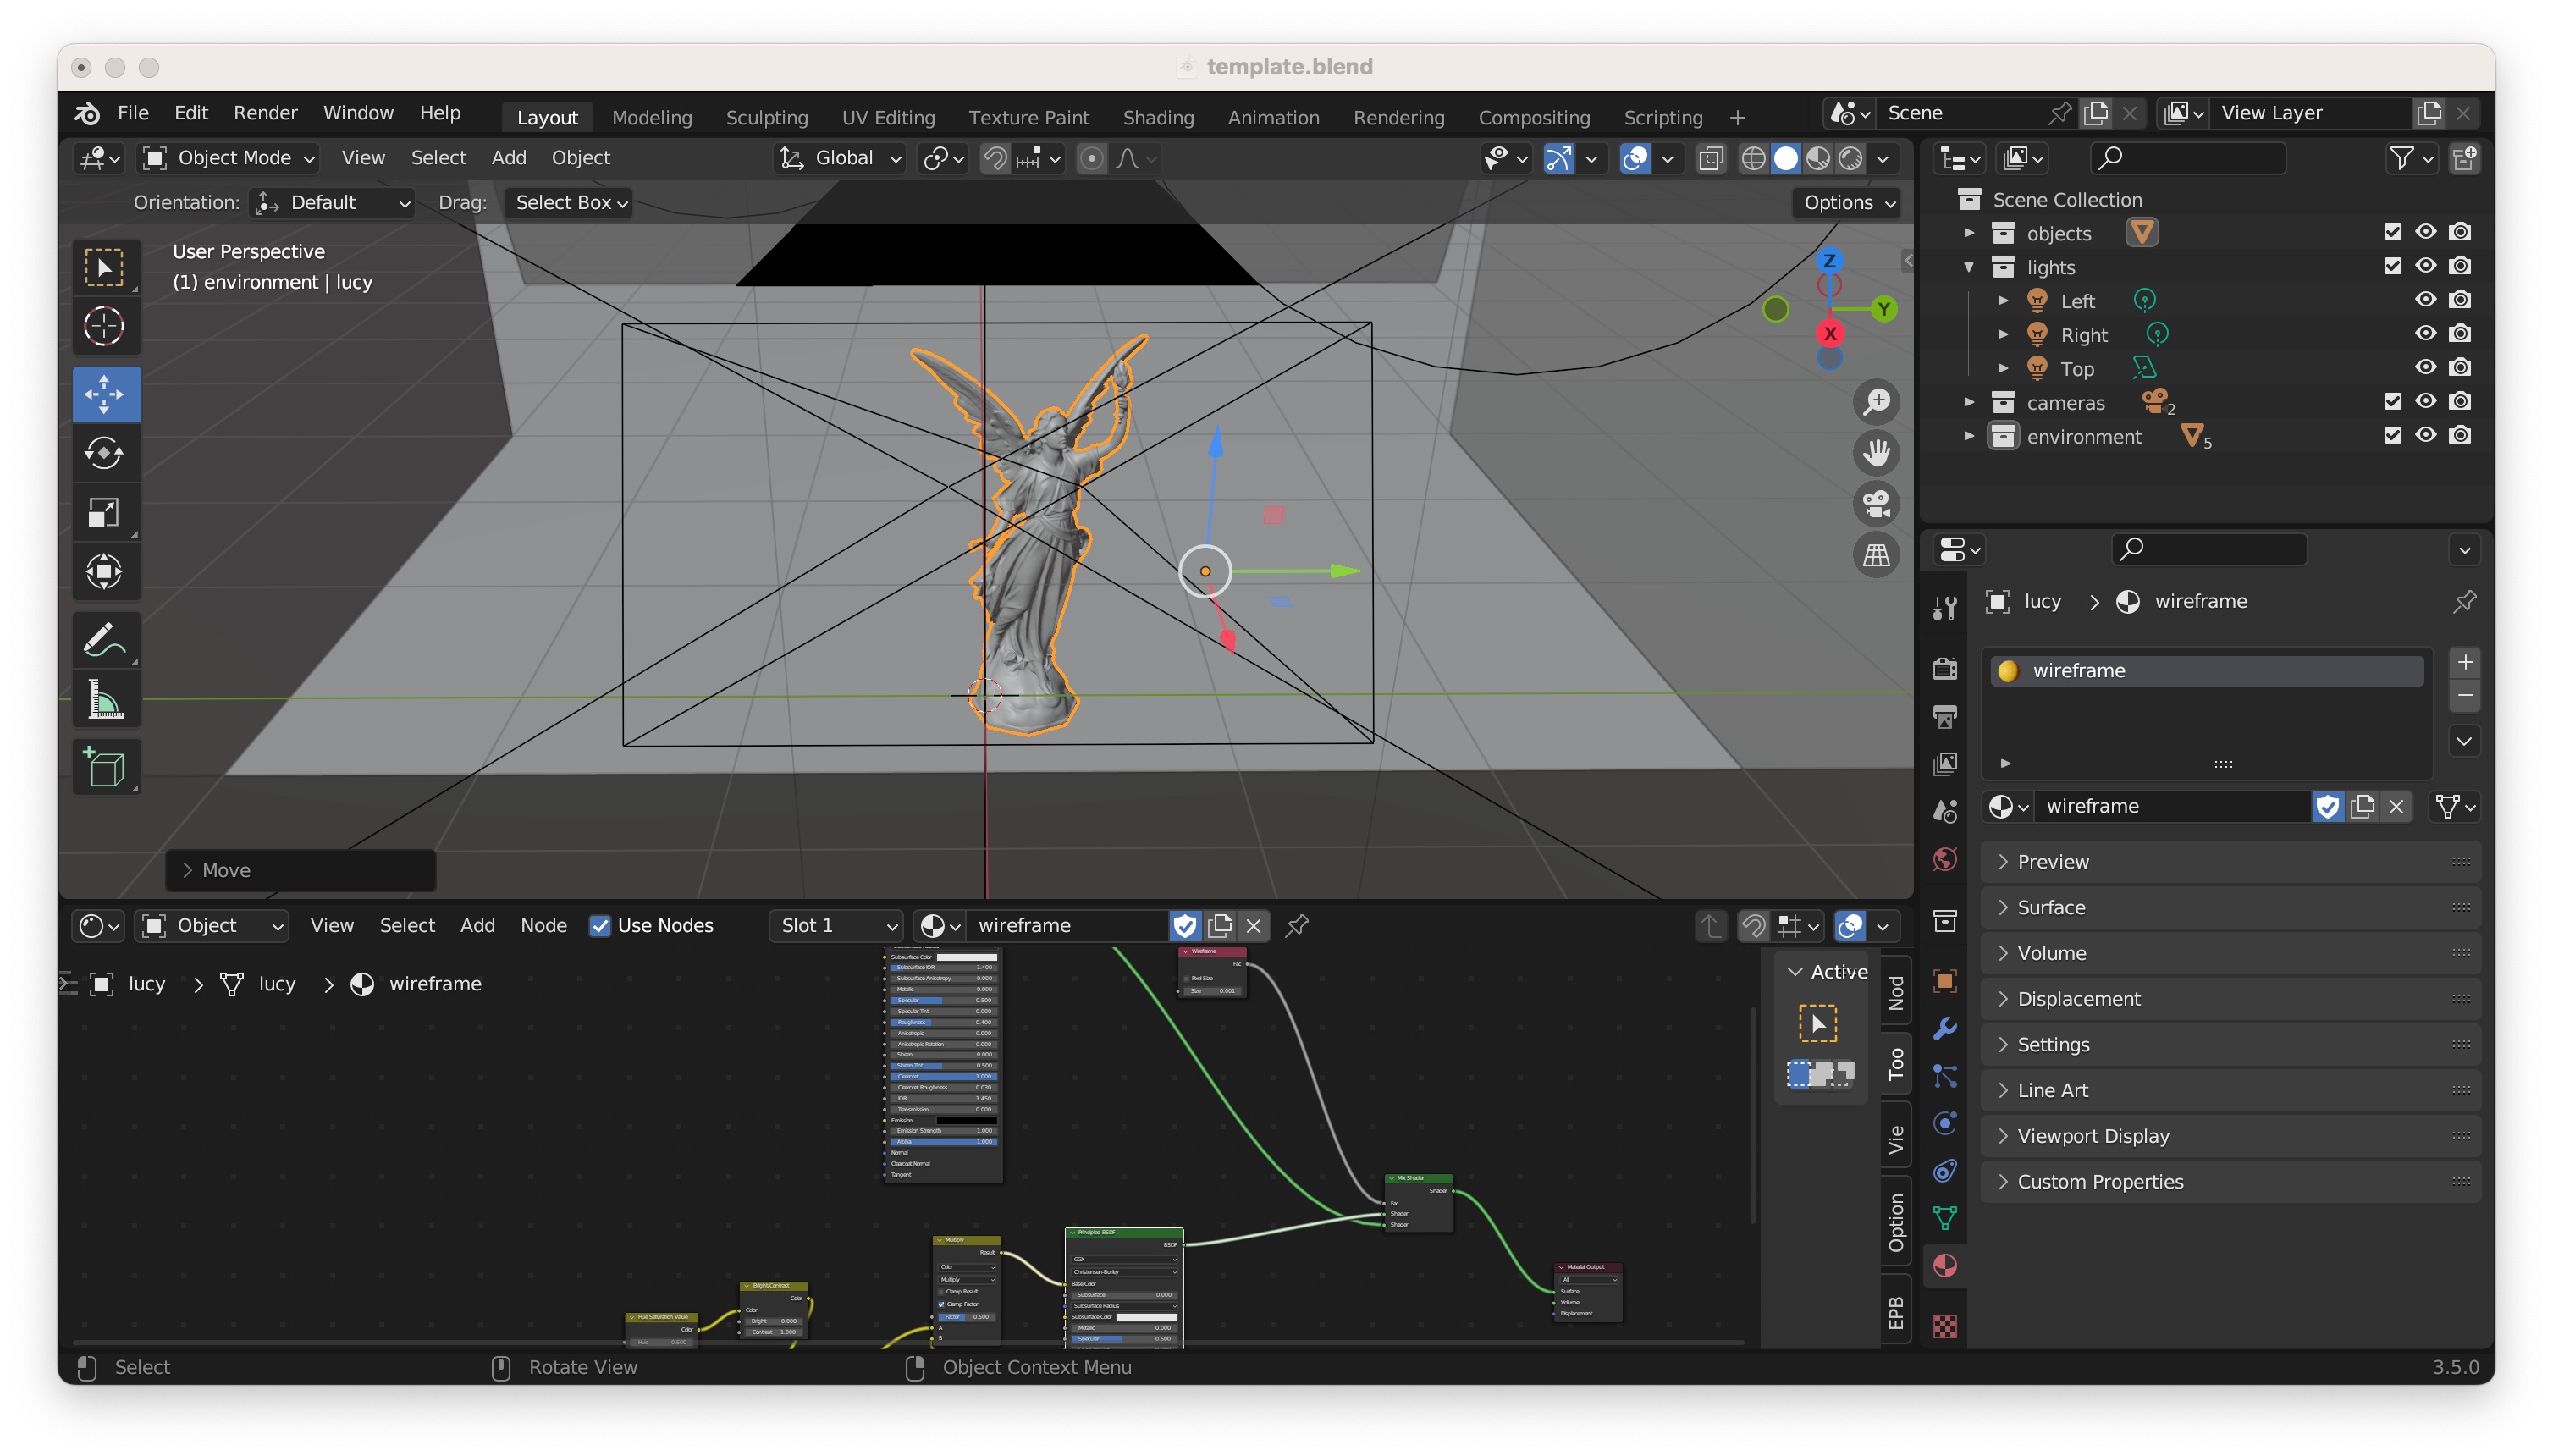
We can now navigate to the scripting window by clicking on the top right, next to compositing, to find something like this
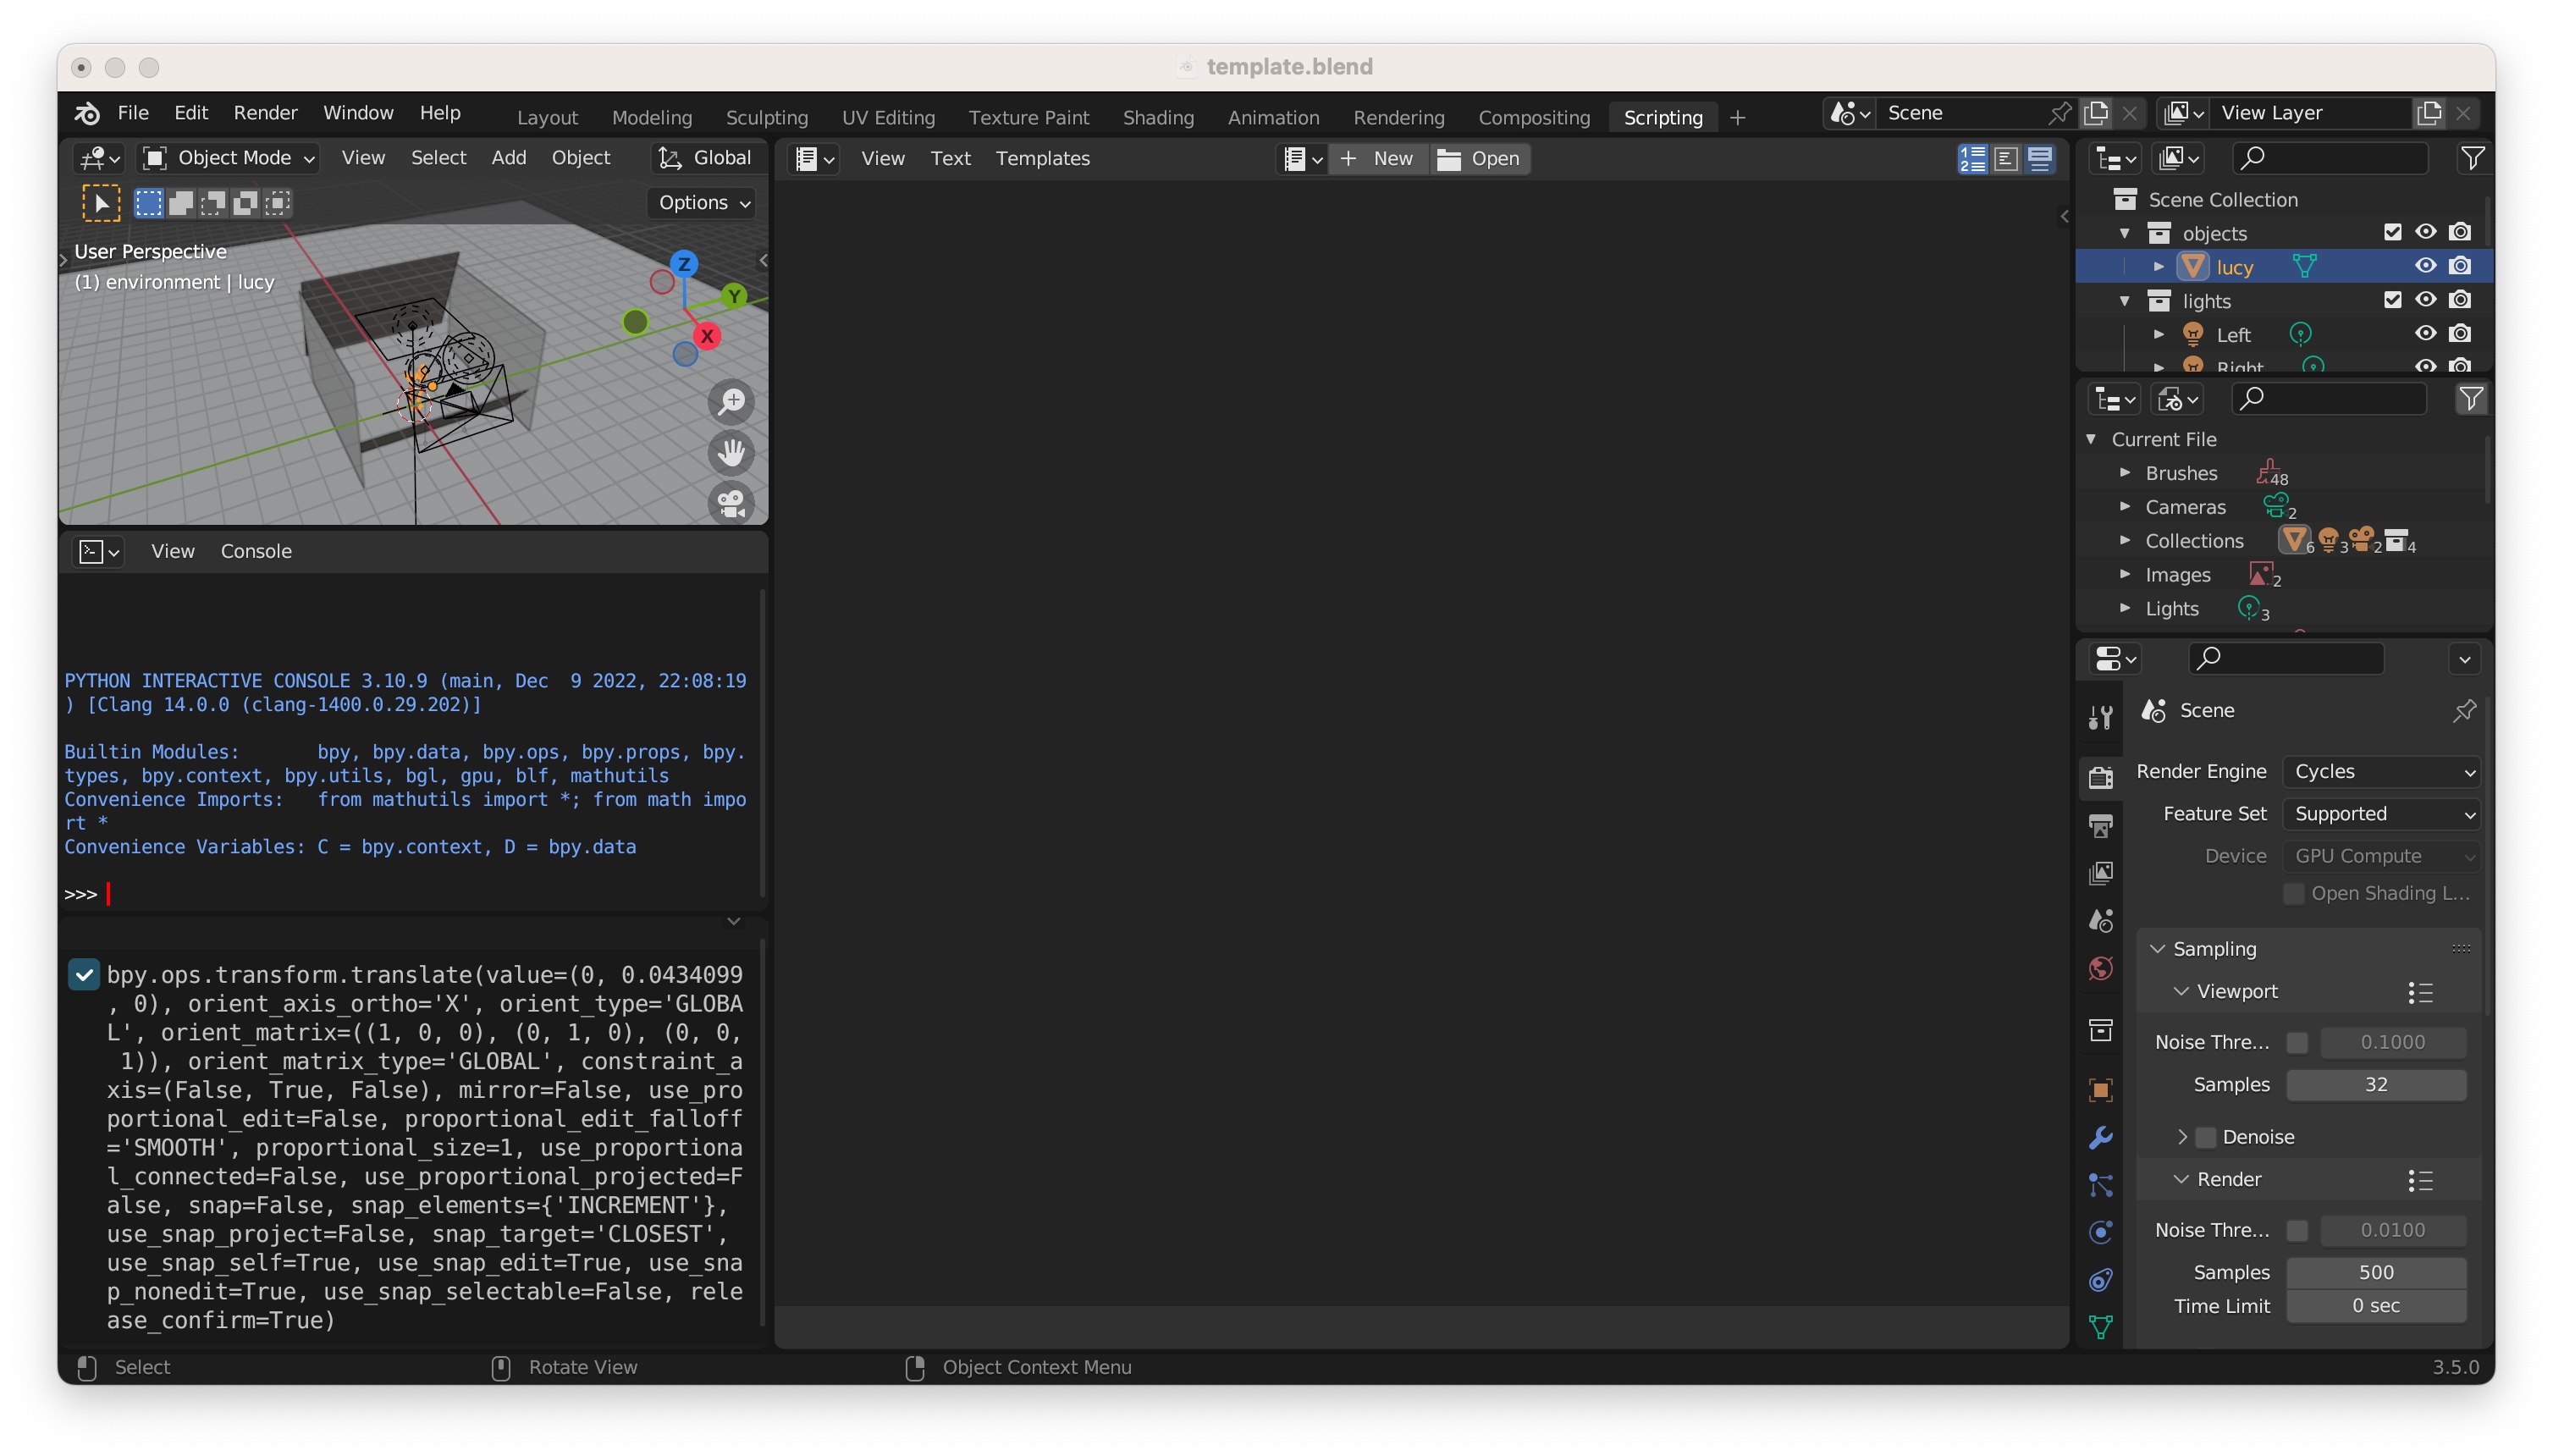
If we look closely at the console of the left, we can see a history of all the recent commands that have been applied to this file through its user interface. In this case, we see one command that corresponds to moving the main object in the scene.
Of course, as computer scientists, it may not be surprising for us to see that all the actions we take in Blender’s graphical interface correspond to executing specific programatic commands. However, what is special about Blender is that these commands are in an accessible, readable programming language (python) and they are exposed such that anyone can learn them and write their own Blender scripts. This option is most attractive to us as academics: often, we want to render two objects with the exact same rendering setup (e.g., for a comparison) or we may want to update a paper figures after a chage in our method by simply re-running a script, without having to resort to hours of GUI manipulation.
Blender toolbox, clone
The best way to start scripting on Blender is with the help of Hsueh-Ti Derek Liu’s own Blender toolbox. We can clone it by running
git clone https://github.com/HTDerekLiu/BlenderToolbox.git
Some of the aspects of this tutorial will rely on specific hardcoded paths, so
let us from now on assume that our directory structure looks like this for some
master directory dir:
dir/
└── BlenderToolbox/
First steps: imports and initialize scene, saving file
To start writing our first Blender script, we will create a new file called
render.py and store it in dir:
dir/
└── BlenderToolbox/
└── render.py
Our file render.py will start with some basic library imports (tip: watch out
for the differences in capitalization of “toolbox”).
import sys, os, bpy, bmesh
import numpy as np
this_file_path = os.path.dirname(__file__)
sys.path.append(os.path.join(this_file_path,'BlenderToolbox'))
import BlenderToolBox as bt
We can now validate that our library import works by executing render.py. A
common mistake here is to attempt to run it using your own local installation of
python (e.g., by running python render.py or python3 render.py). Instead, we
need to execute it through Blender’s python installation, by running
/your/path/to/blender --background --python render.py
where it should be noted that the path is to the blender binary, not the
application. For example, on my MacBook, the path is
/Applications/Blender.app/Contents/MacOS/Blender. Since we will often use this
command, it can be useful to define a shorthand alias; for example, in my
~/.bash_profile I have added
alias blender='/Applications/Blender.app/Contents/MacOS/Blender'
function blender-python() {
    if [ "$1" == "-q" ] || [ "$1" == "--quiet" ] ; then
        blender --background --python "$2" 1> /dev/null
    else
        blender --background --python "$1"
    fi
}
which allows me to use blender to refer to the whole path above, and
blender-python to add the --background --python options. Then, we can just
do
blender-python render.py
Command line aliases can be a little tricky, so if this does not work for you,
do not fret. Just swap blender-python for /your/path/to/blender --background --python in all that follows.
Alright! Hopefully our imports worked and render.py executed without issues.
We can now start creating our Blender file programatically. Our first step will
be to initialize a scene with a given resolution. We could do this by adding
this after the imports:
resolution_x = 100
resolution_y = 100
bt.blenderInit(resolution_x,resolution_y)
In practice, it can be useful to have a parameter mult that we can use to
easily alternate between the low resolutions we tend to use for prototyping and
the high ones for final figure versions:
mult = 10
resolution_x = 100*mult
resolution_y = 100*mult
numSamples = 100*mult # no need to understand what this does yet
bt.blenderInit(resolution_x,resolution_y,numSamples=numSamples)
Our render.py should look like this now:
import sys, os, bpy, bmesh
import numpy as np
this_file_path = os.path.dirname(__file__)
sys.path.append(os.path.join(this_file_path,'BlenderToolbox'))
import BlenderToolBox as bt

mult = 10
resolution_x = 100*mult
resolution_y = 100*mult
numSamples = 100*mult # no need to understand what this does yet
bt.blenderInit(resolution_x,resolution_y,numSamples=numSamples)
Save file
Hopefully, running blender-python render.py on the script above does not
return any errors. This means it has succesfully initialized a blender scene;
however, it can be hard to validate that it has done so correctly. A good way of
doing this is by adding a last instruction at the end of render.py to save the
scene into a .blend Blender file:
save_path = this_file_path + '/test.blend'
bpy.ops.wm.save_mainfile(filepath=save_path)
Our render.py should look like this now:
# boring imports
import sys, os, bpy, bmesh
import numpy as np
this_file_path = os.path.dirname(__file__)
sys.path.append(os.path.join(this_file_path,'BlenderToolbox'))
import BlenderToolBox as bt

# initialize shape
mult = 1 # make this 1-5 for fast, 10-15 for final paper
resolution_x = 100*mult
resolution_y = 100*mult
numSamples = 100*mult # no need to understand what this does yet
bt.blenderInit(resolution_x,resolution_y,numSamples=numSamples)

# save to blend file
save_path = this_file_path + '/test.blend'
bpy.ops.wm.save_mainfile(filepath=save_path)
Our directory will now be populated with a test.blend file:
dir/
└── BlenderToolbox/
└── render.py
└── test.blend
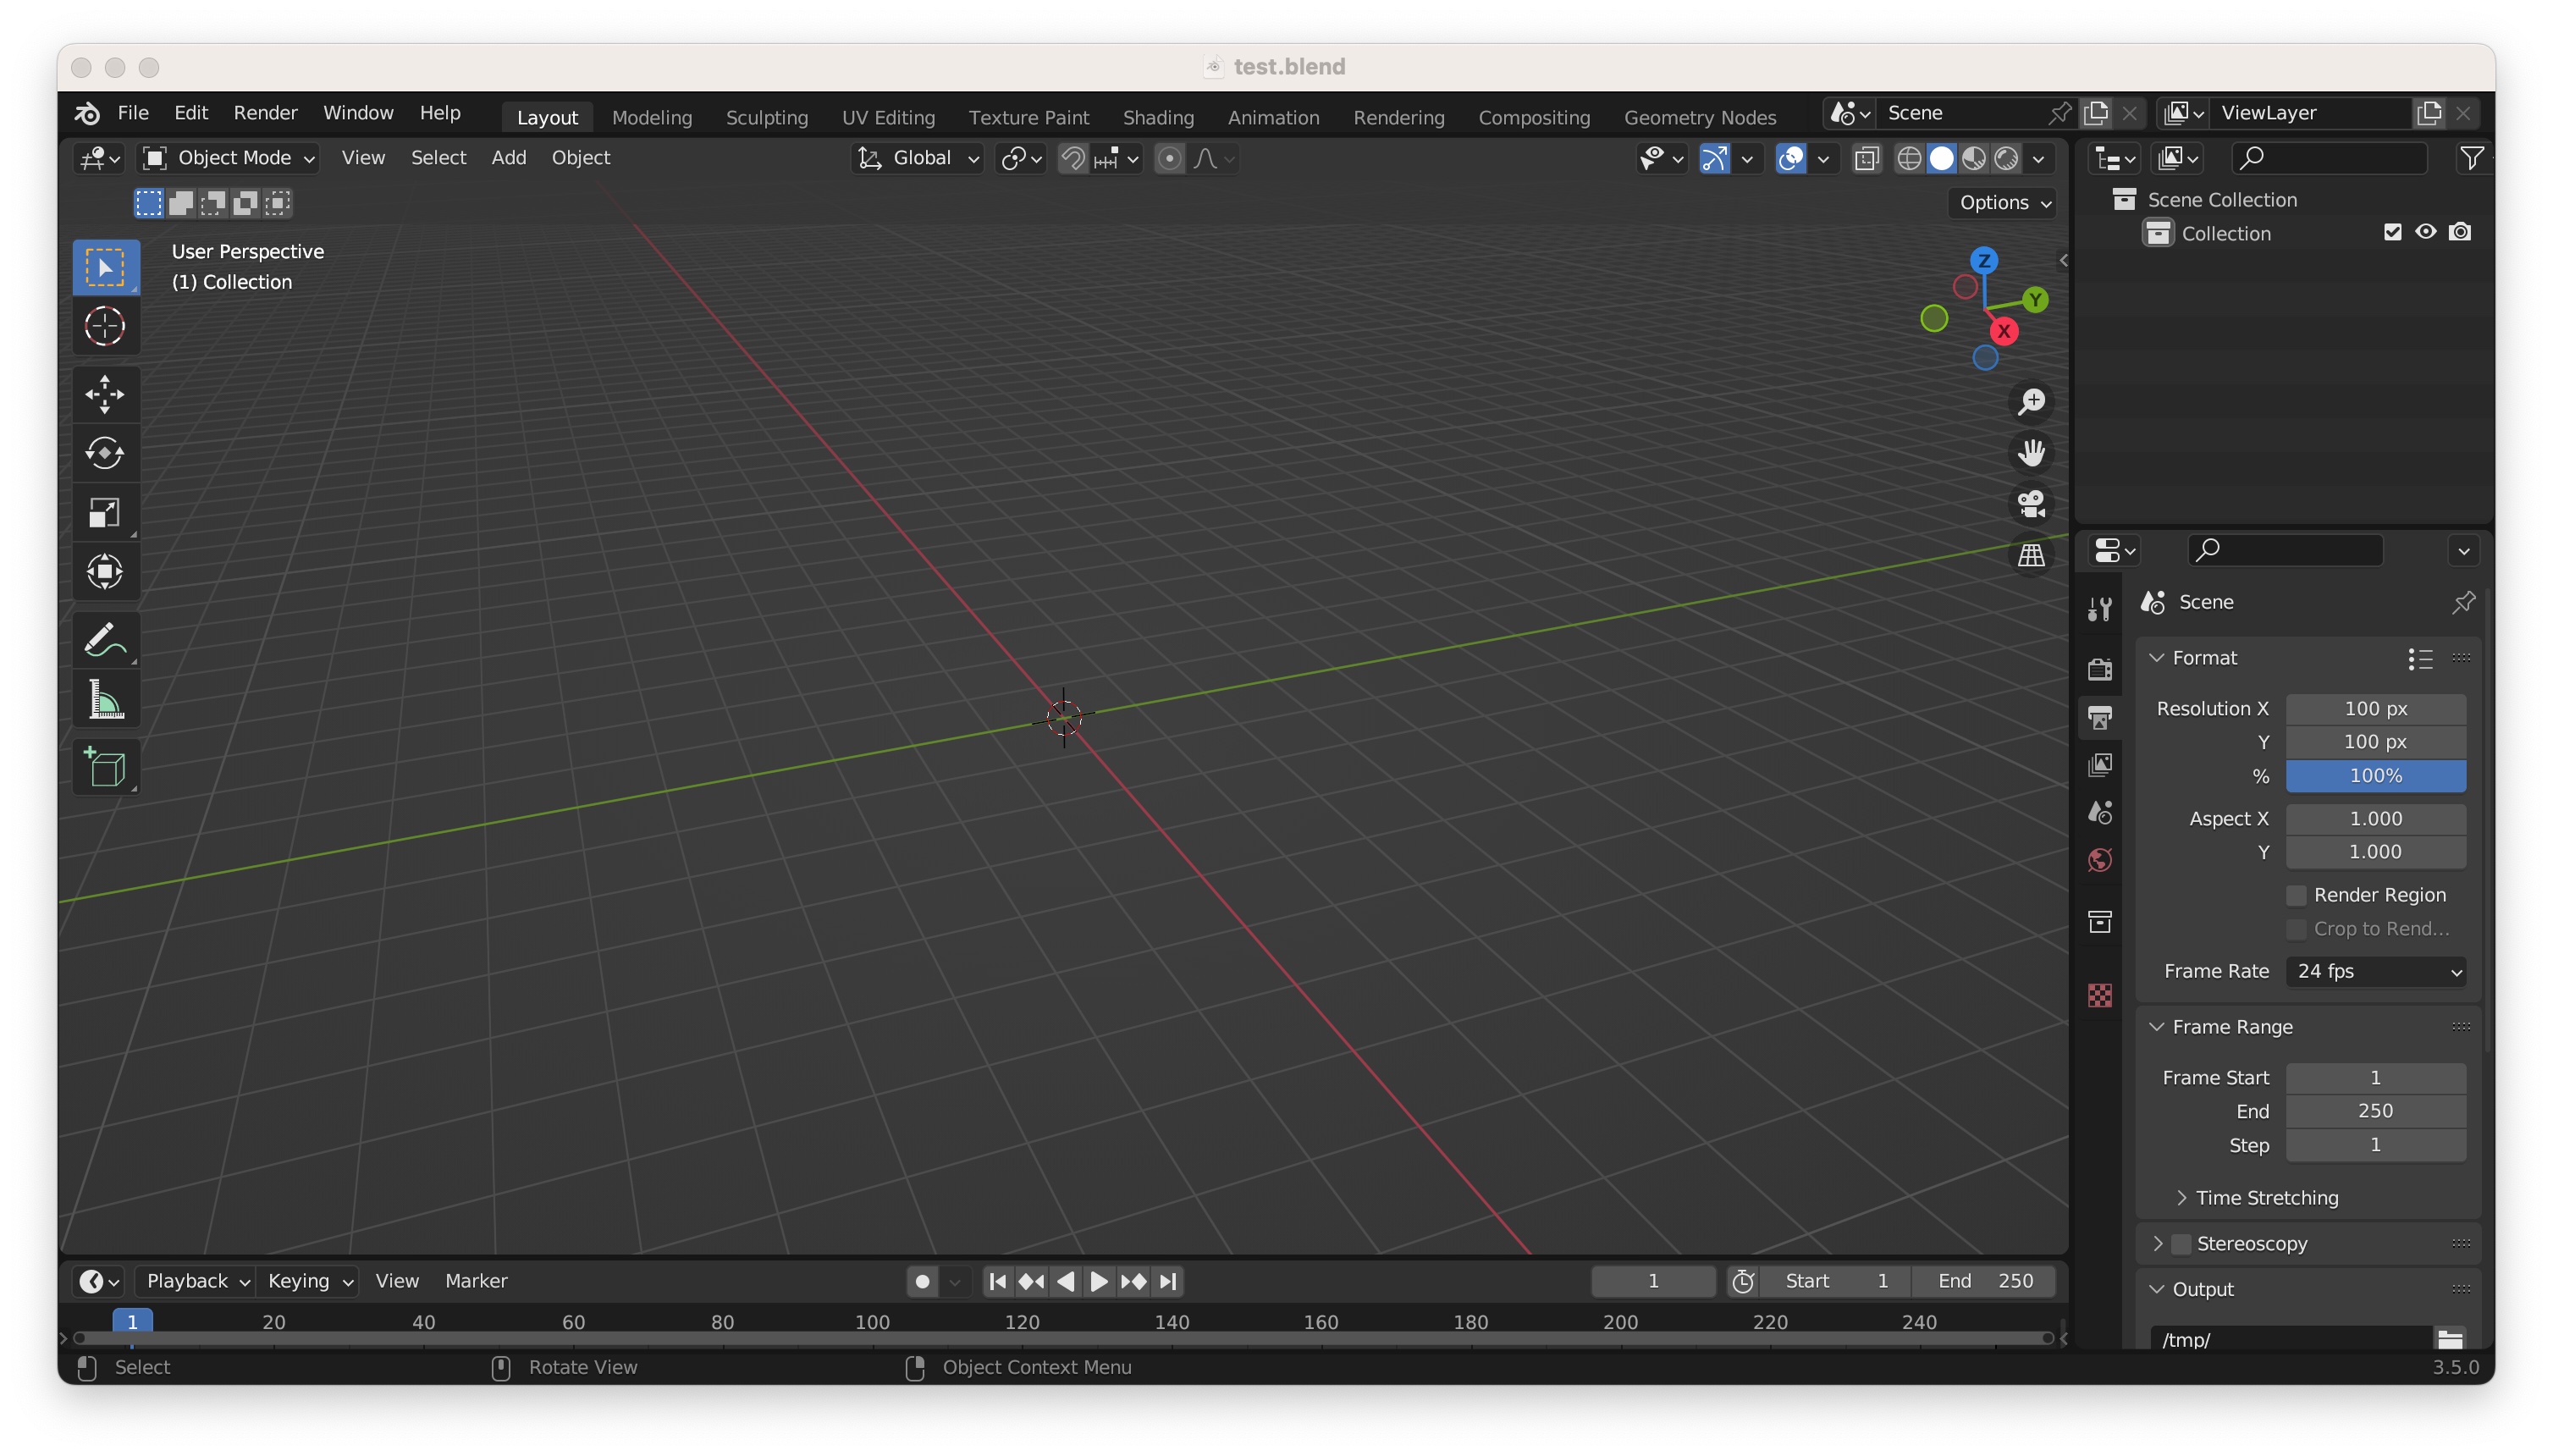
If we open it, we will indeed see an empty scene; and if we go to the render paramaters, we will see the expected 100 by 100 resolution:
Read mesh
Let’s now import the object we want to render. We can do this with
bt.readMesh. For example, let us assume that we have a mesh called dog.obj in our directory (I am using this amazing dog mesh designed by the magnificent Josh Holinaty):
dir/
└── BlenderToolbox/
└── render.py
└── test.blend
└── dog.obj
In that case, we can read it with
path_to_mesh = this_file_path + '/dog.obj'
mesh_location = (0,0,0)
mesh_rotation = (0,0,0)
mesh_scale = (1,1,1)
mesh = bt.readMesh(path_to_mesh,mesh_location,mesh_rotation,mesh_scale)
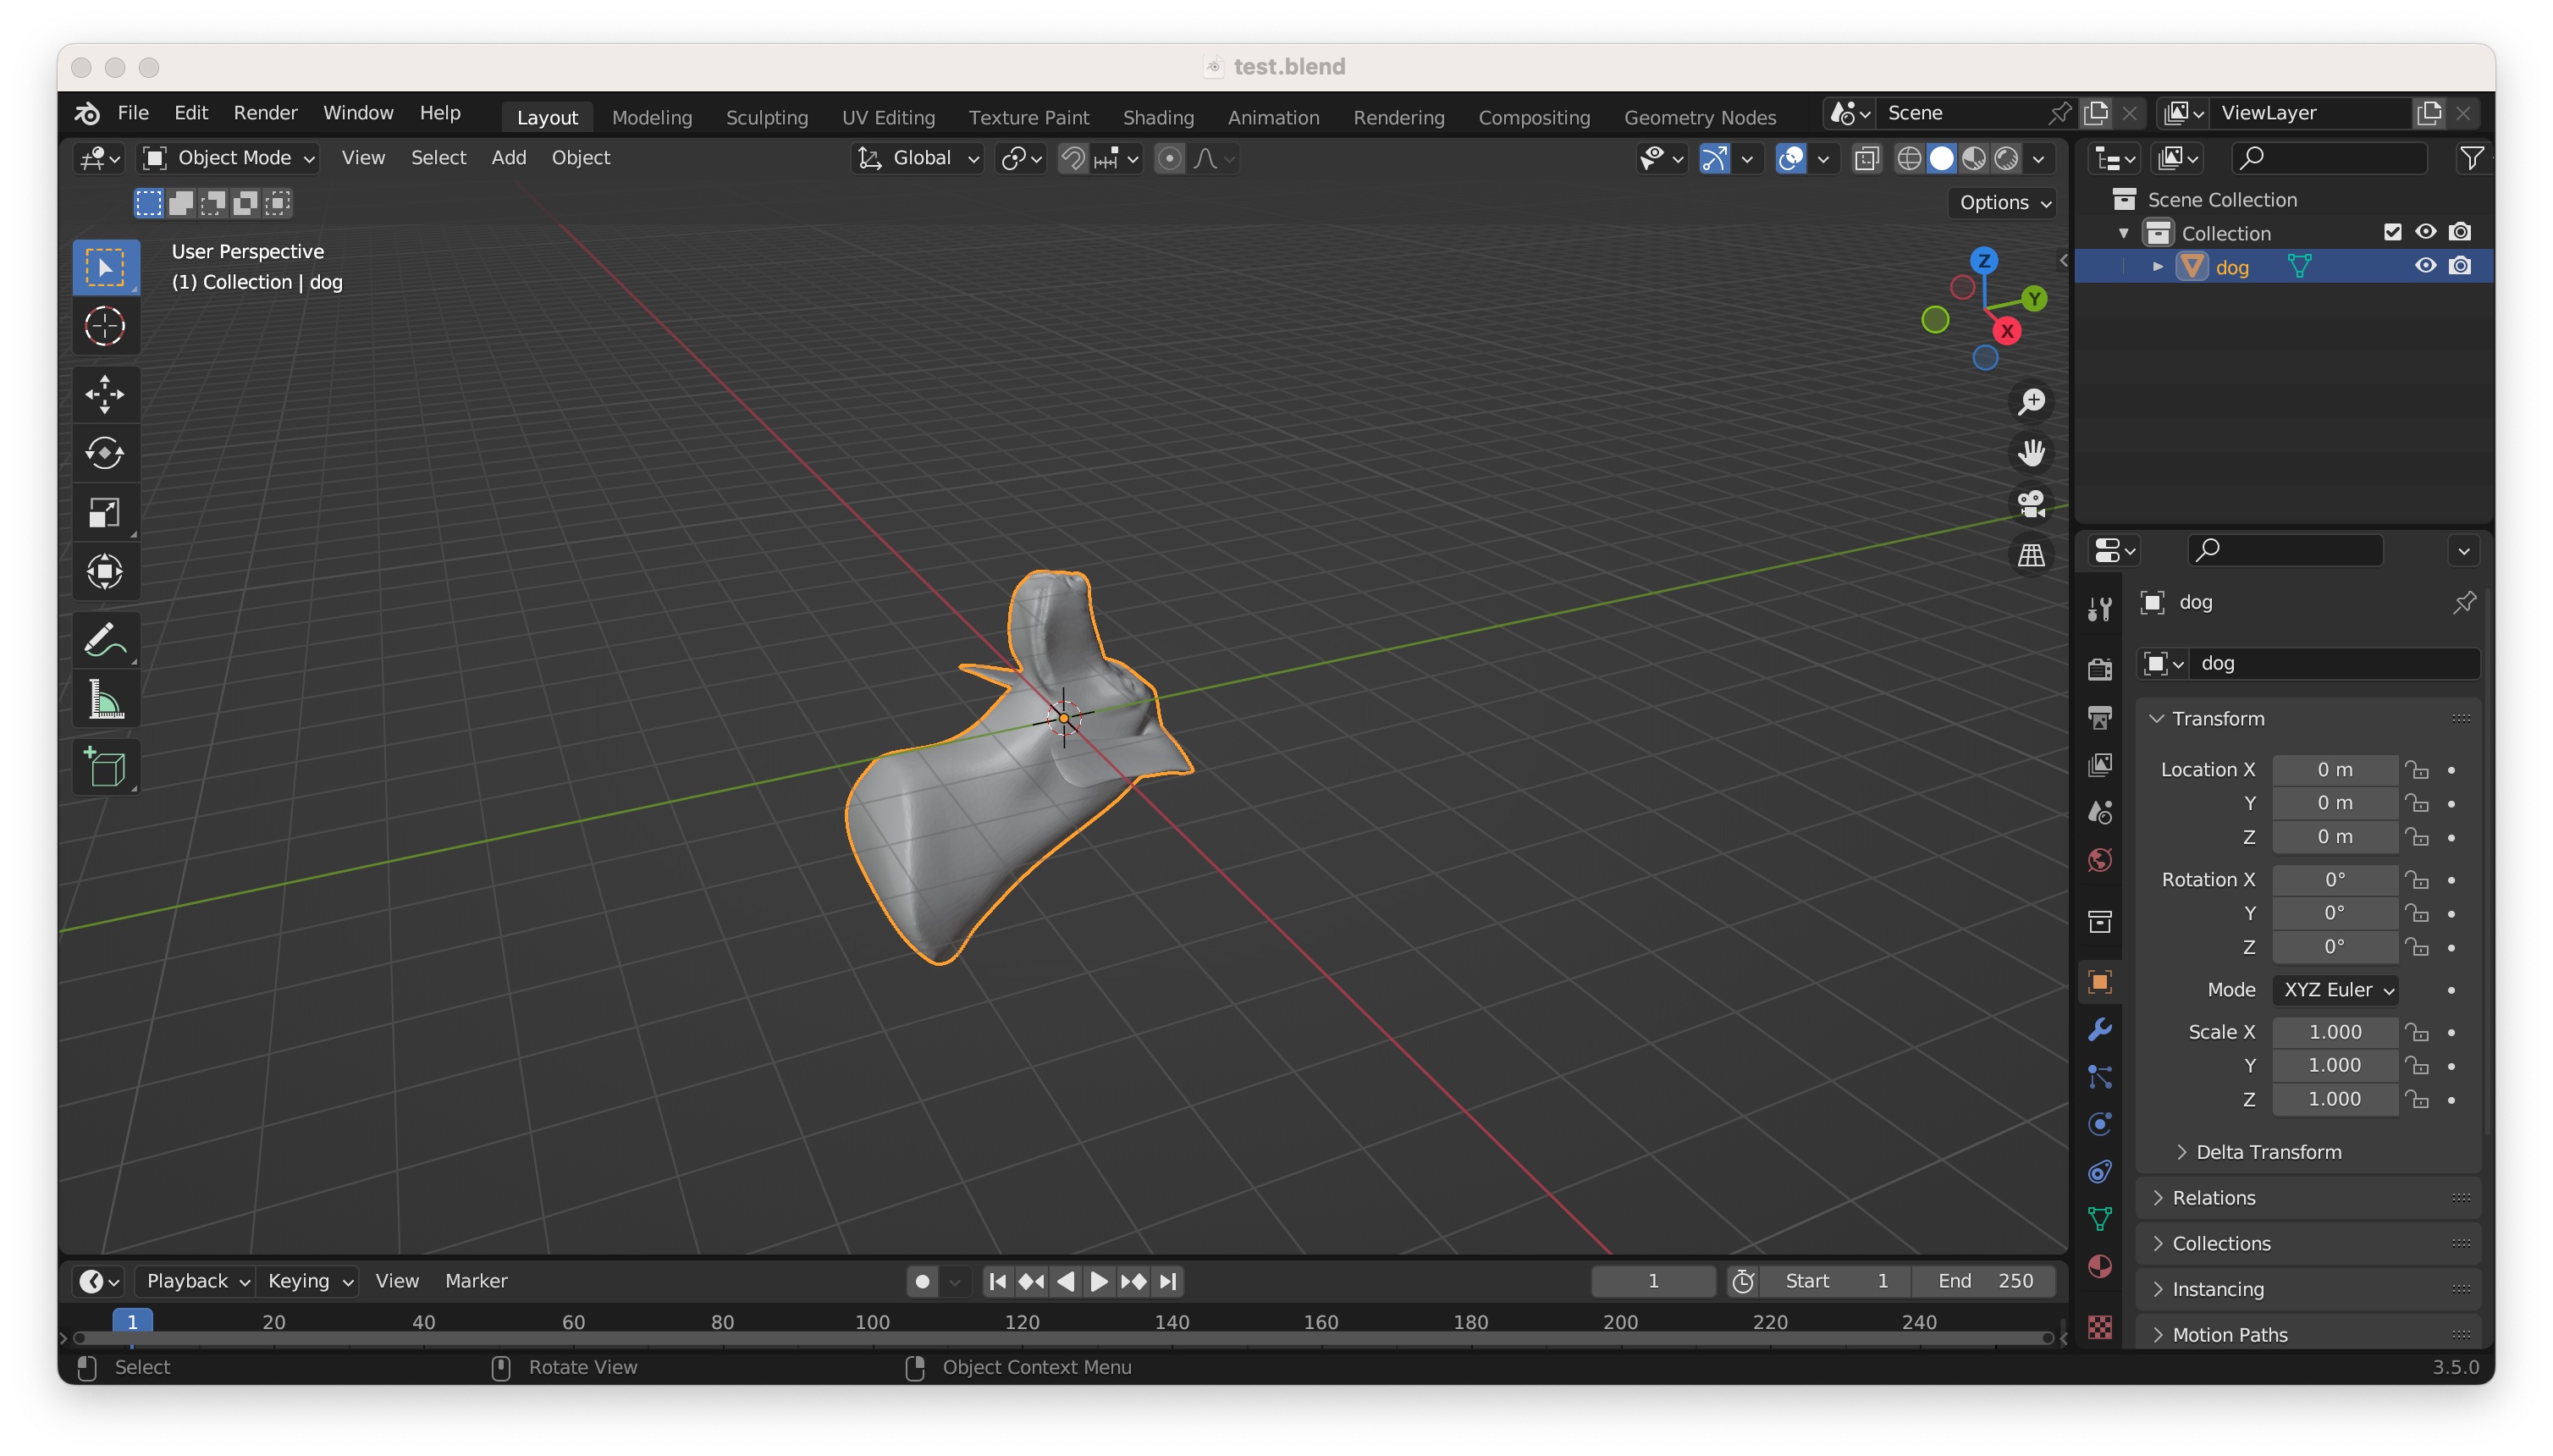
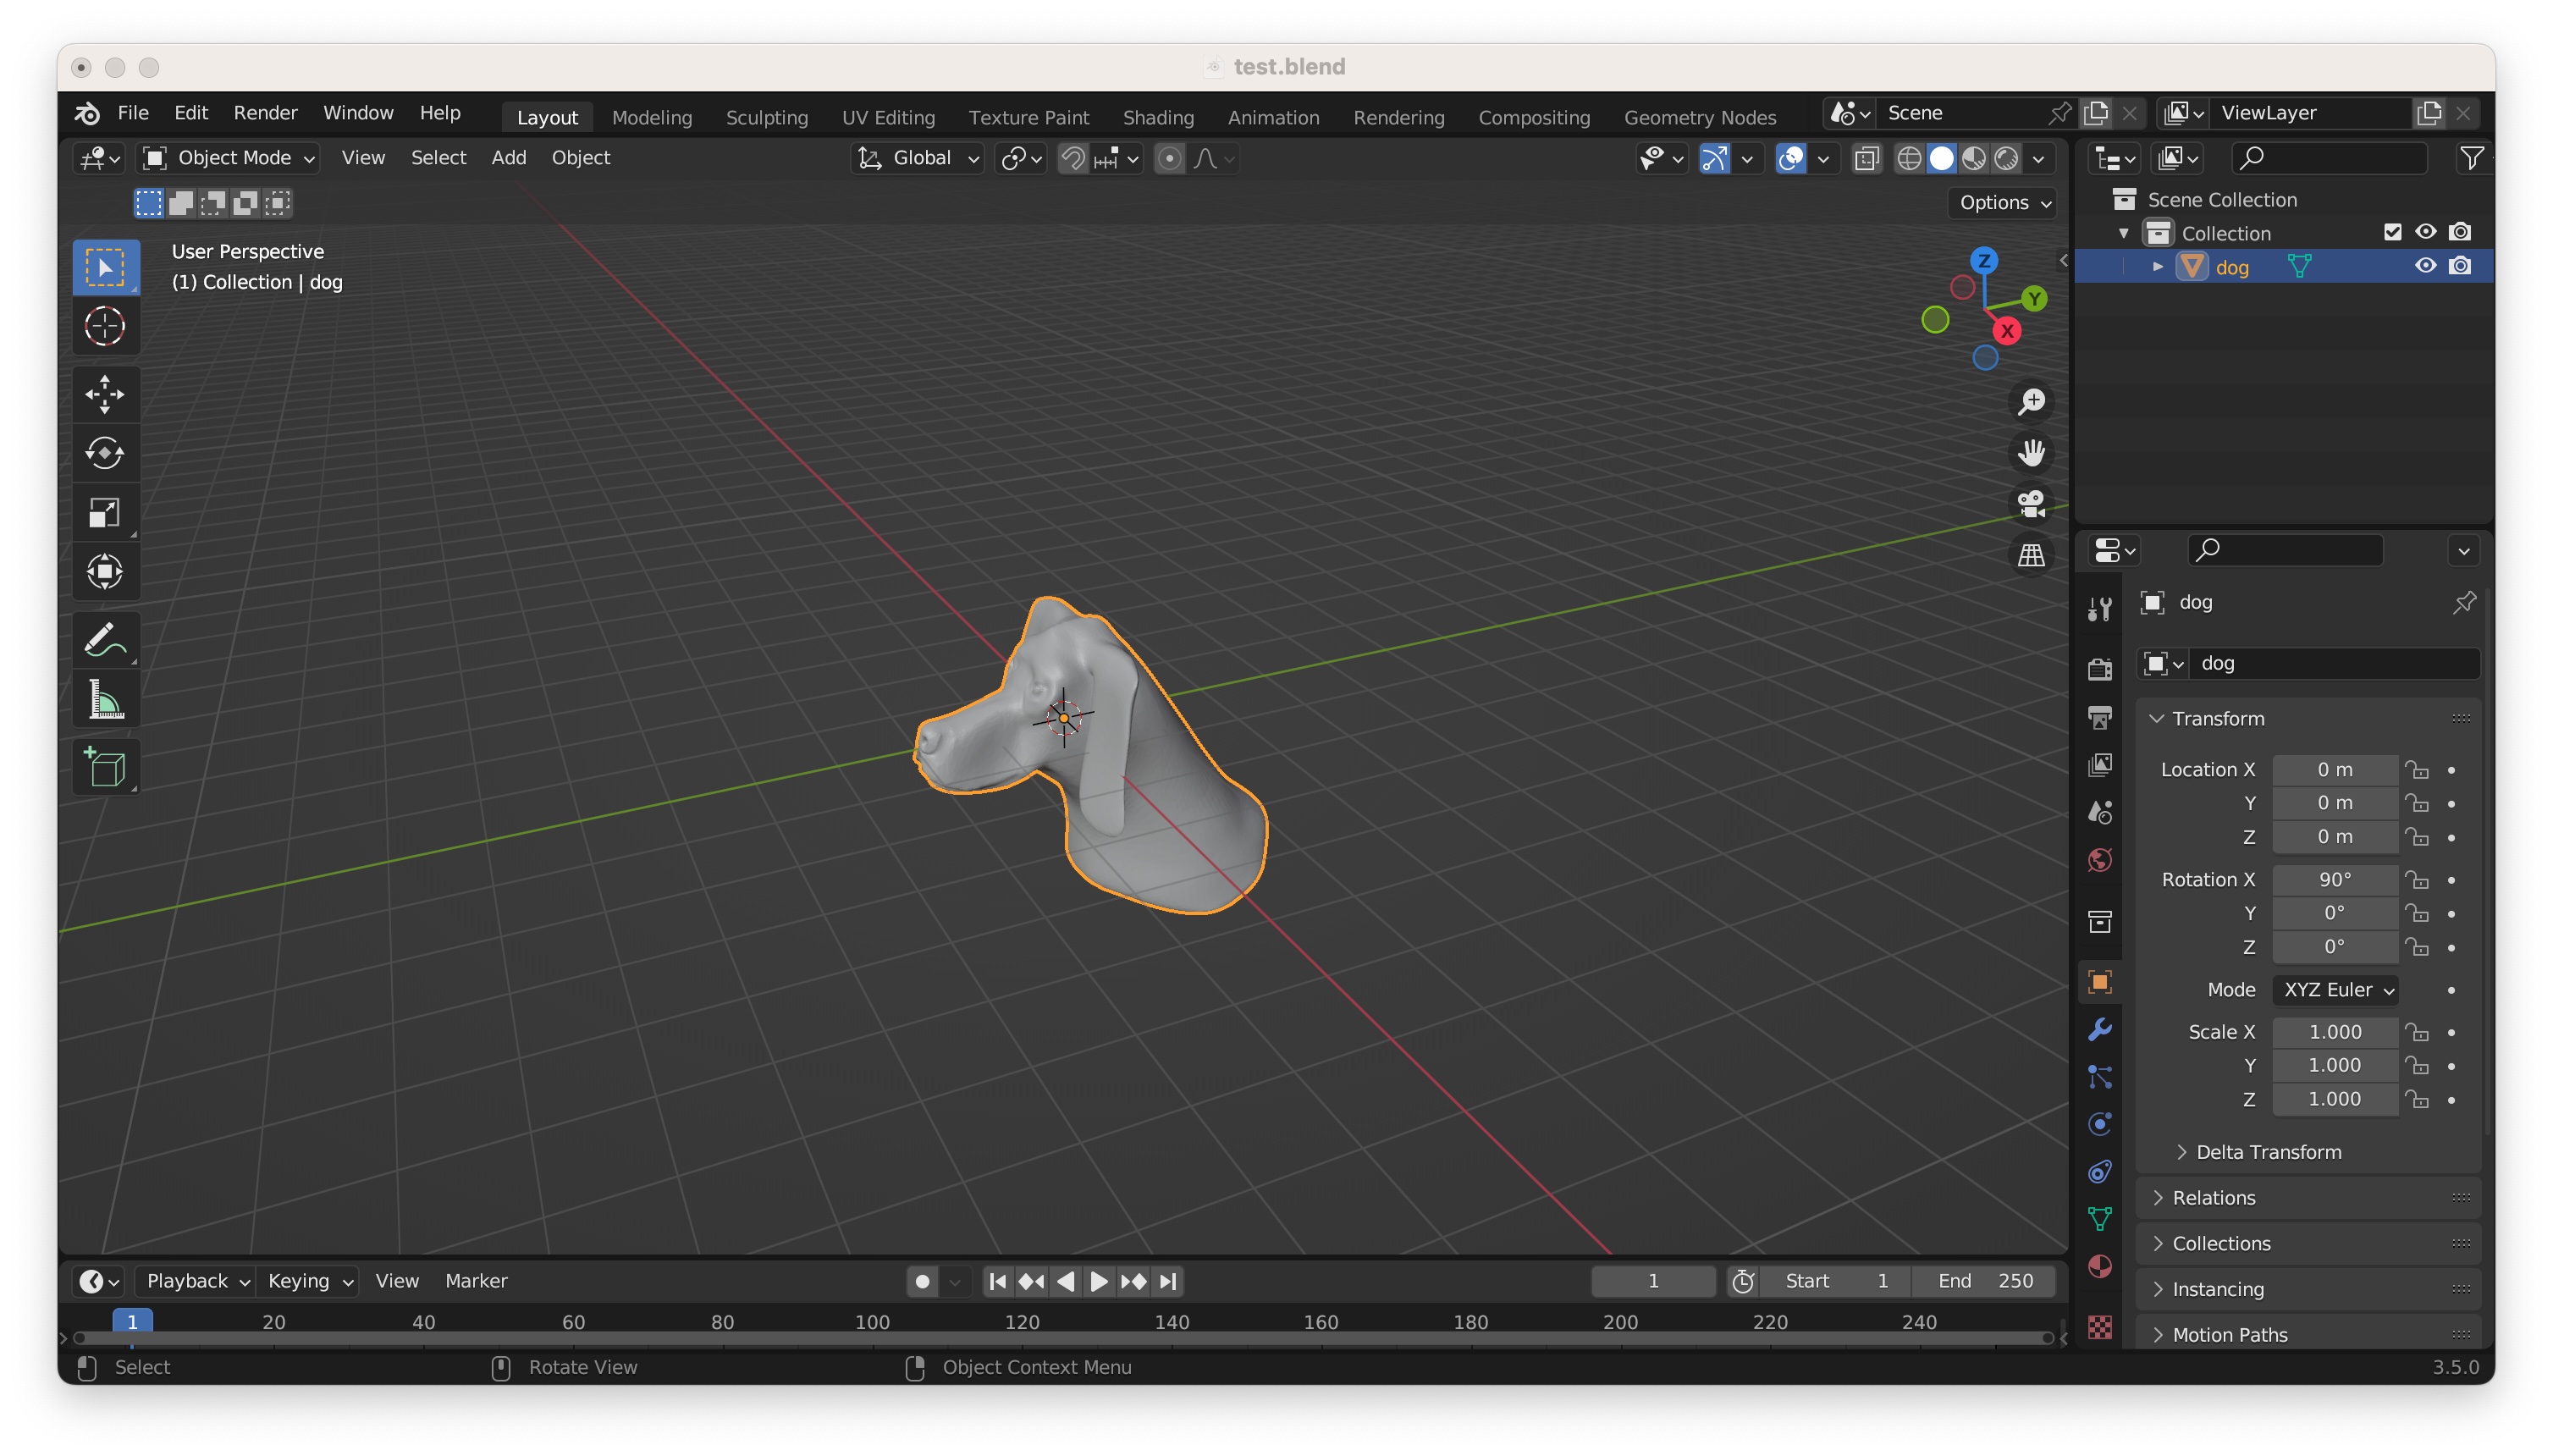
It can be hard to come up with the correct location and translation without any
visual cues. Instead of trying to do that, I recommend starting by making them
zero, as above. Then, if we make sure to place the call to readMesh before
the call to save_mainfile, we can run blender-python render.py and open the
resulting test.blend:
Then, we can use the GUI to find a good orientation, which in this case is
(90,0,0)
and update that rotation in our script, such that render.py now looks like
this:
# boring imports
import sys, os, bpy, bmesh
import numpy as np
this_file_path = os.path.dirname(__file__)
sys.path.append(os.path.join(this_file_path,'BlenderToolbox'))
import BlenderToolBox as bt

# initialize shape
mult = 1 # make this 1-5 for fast, 10-15 for final paper
resolution_x = 100*mult
resolution_y = 100*mult
numSamples = 100*mult # no need to understand what this does yet
bt.blenderInit(resolution_x,resolution_y,numSamples=numSamples)

# read mesh
path_to_mesh = this_file_path + '/dog.obj'
mesh_location = (0,0,0)
mesh_rotation = (90,0,0)
mesh_scale = (1,1,1)
mesh = bt.readMesh(path_to_mesh,mesh_location,mesh_rotation,mesh_scale)

# save to blend file
save_path = this_file_path + '/test.blend'
bpy.ops.wm.save_mainfile(filepath=save_path)
Camera
Once we have imported the object, the next critical element we need to take an image of it is a camera. In a similar way to how we set up the mesh, we will import the camera with zero rotation and translation
# add camera
cam_location = (0,0,0)
cam_rotation = (0,0,0)
cam = bt.setCamera_from_UI(cam_location,cam_rotation)
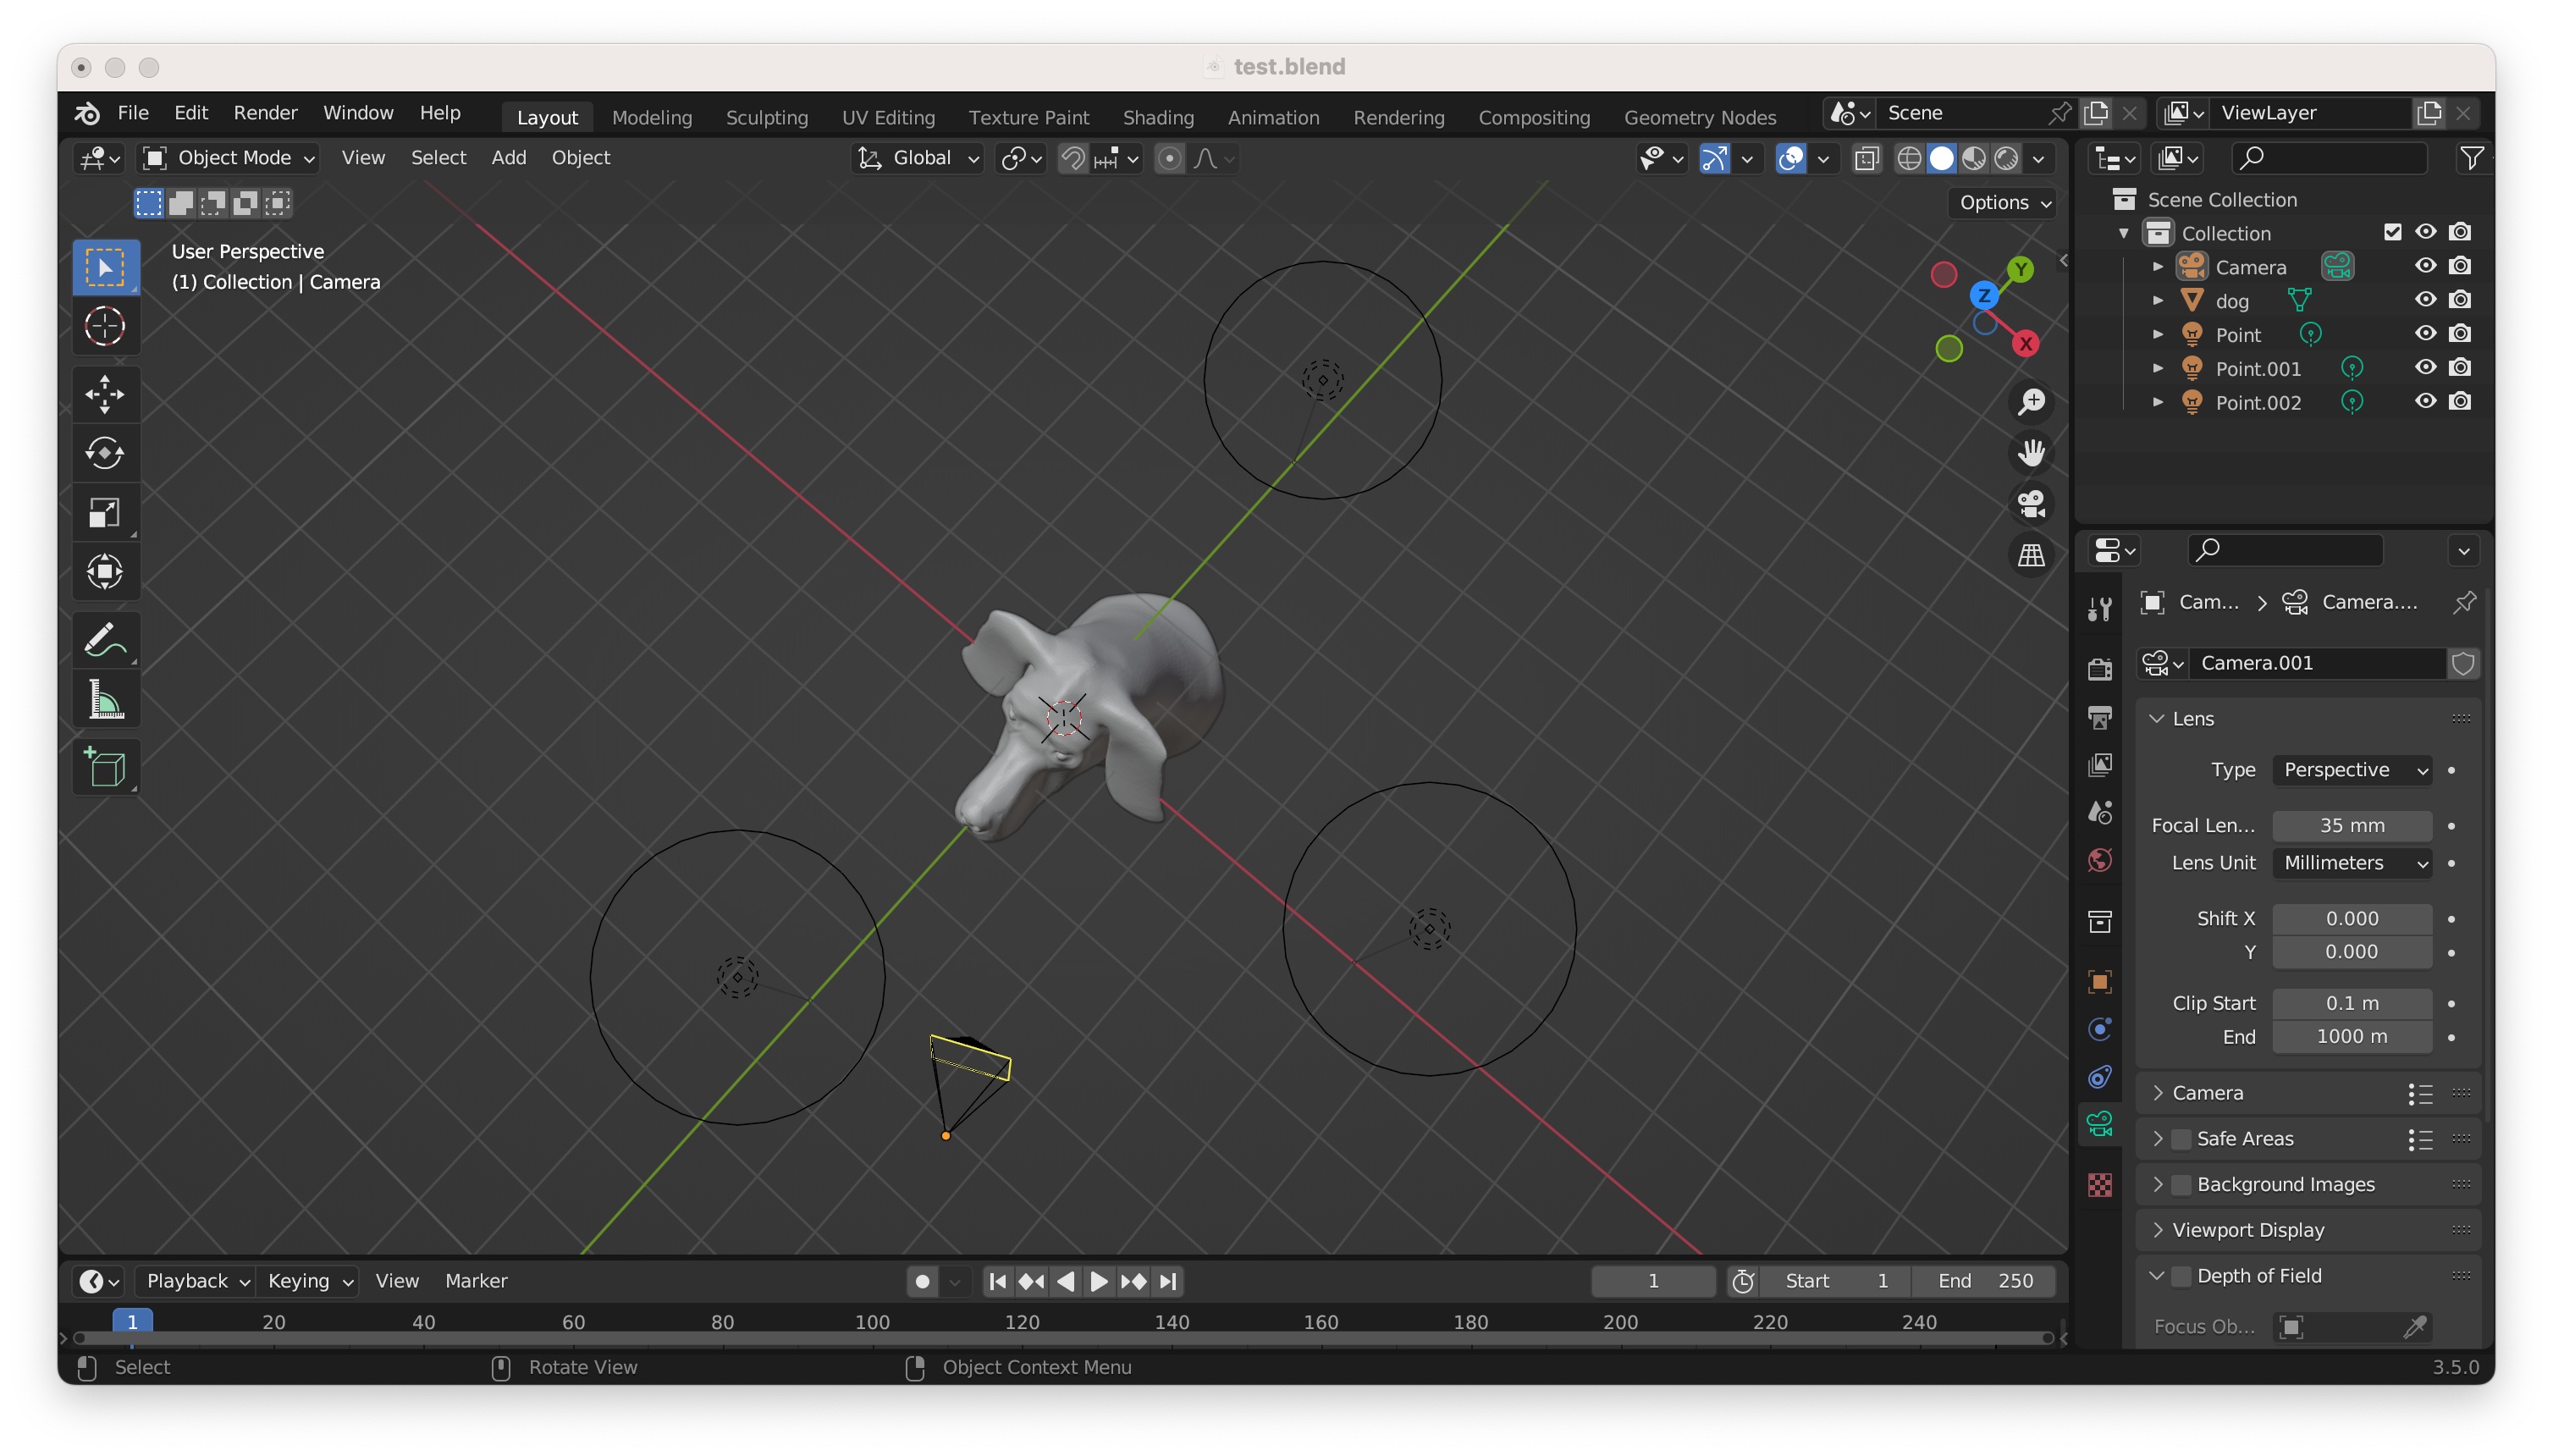
then open the generated test.blend:
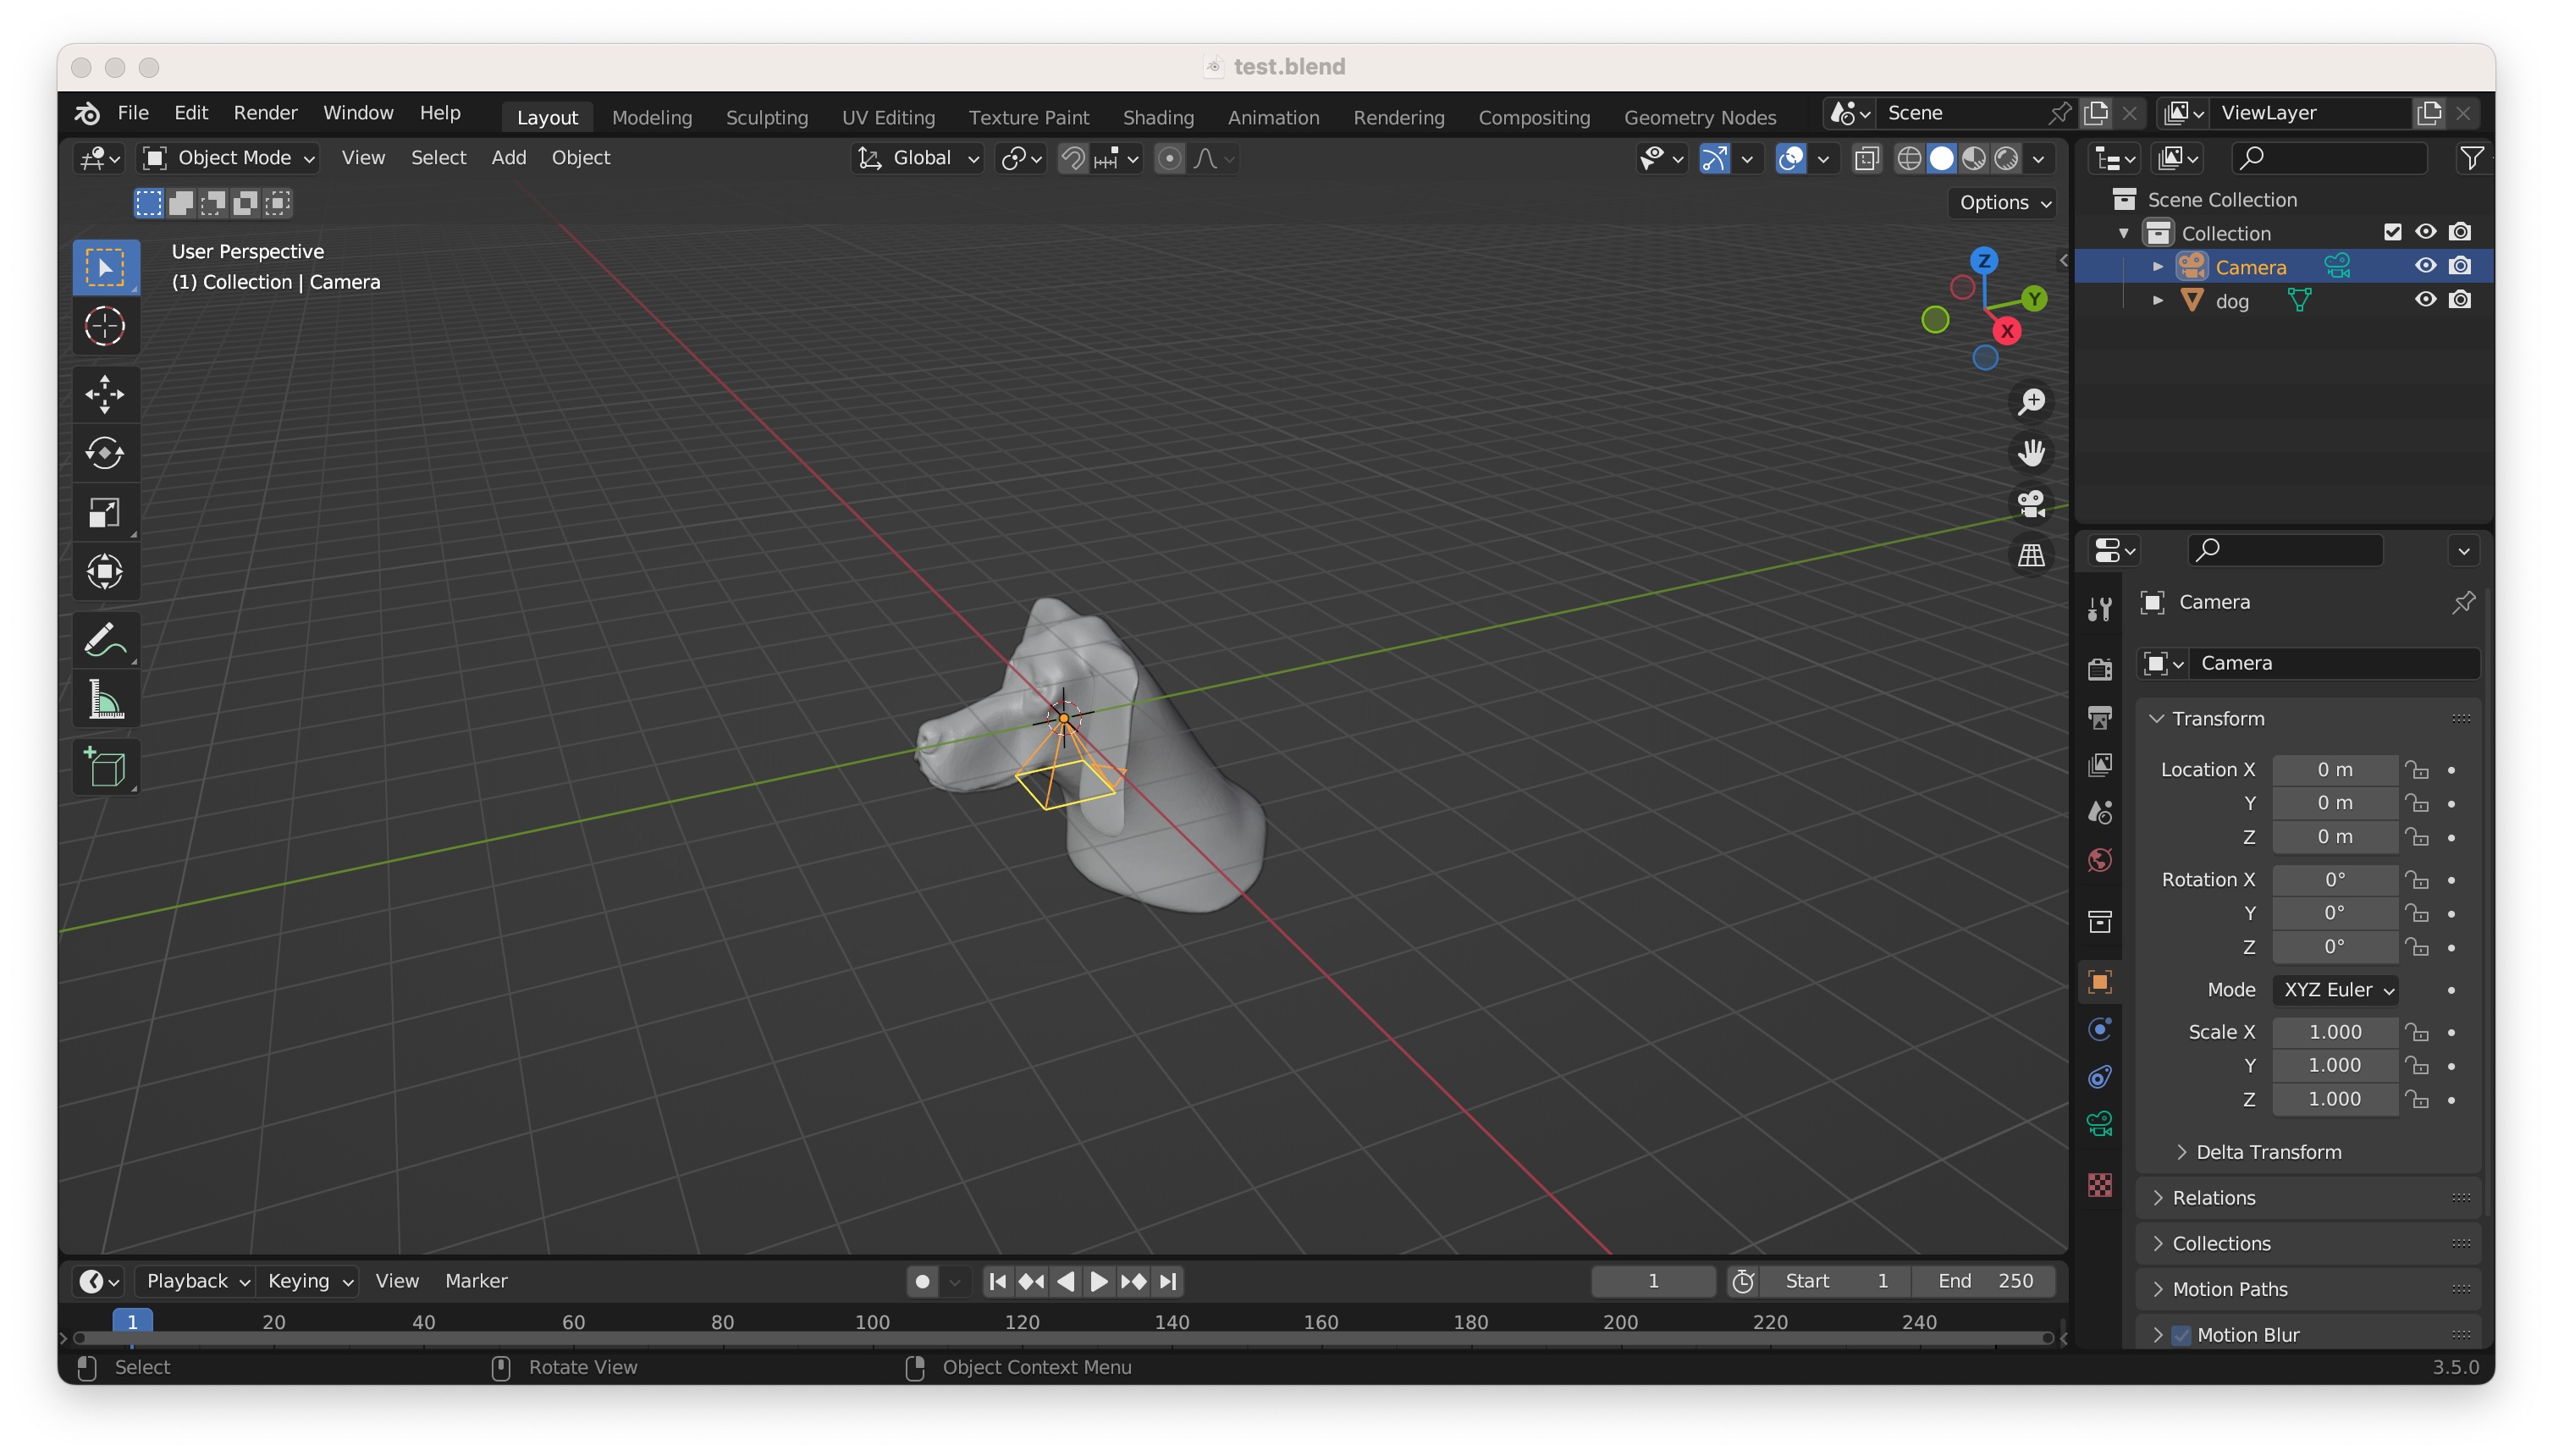
We can now move the camera until the optimal position is found
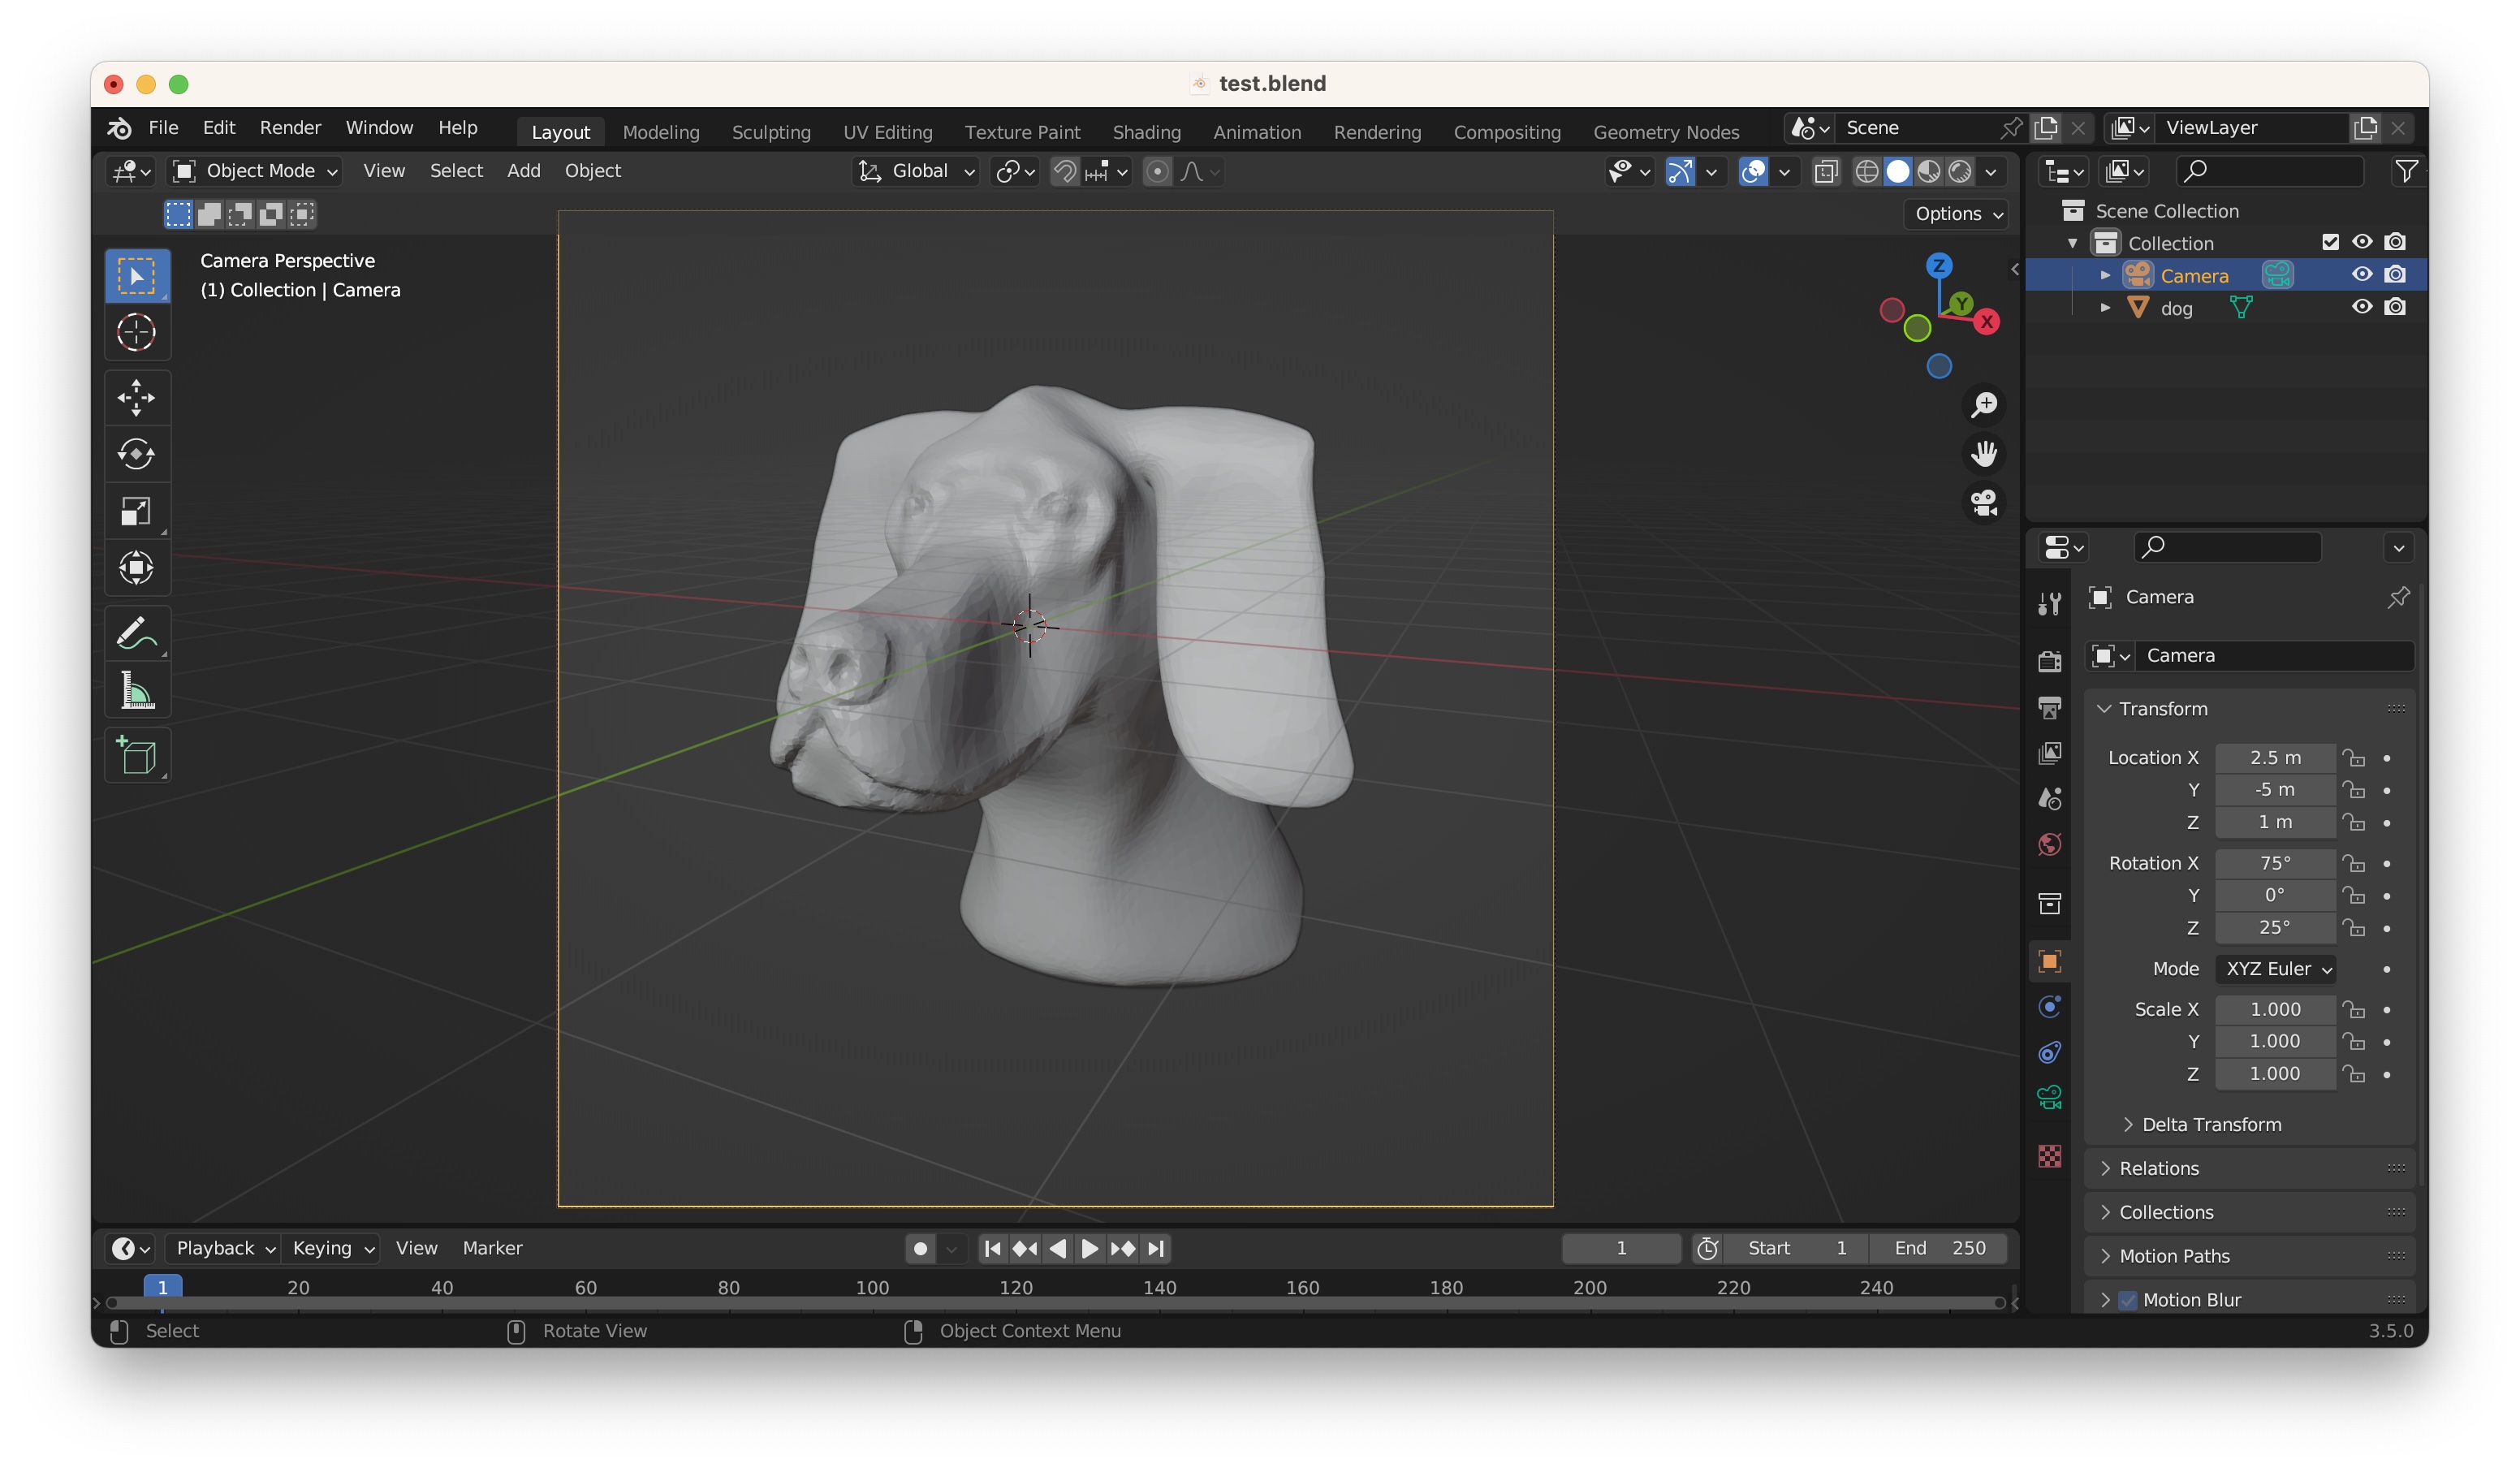
and update our render.py accordingly:
# boring imports
import sys, os, bpy, bmesh
import numpy as np
this_file_path = os.path.dirname(__file__)
sys.path.append(os.path.join(this_file_path,'BlenderToolbox'))
import BlenderToolBox as bt

# initialize shape
mult = 1 # make this 1-5 for fast, 10-15 for final paper
resolution_x = 100*mult
resolution_y = 100*mult
numSamples = 100*mult # no need to understand what this does yet
bt.blenderInit(resolution_x,resolution_y,numSamples=numSamples)

# read mesh
path_to_mesh = this_file_path + '/dog.obj'
mesh_location = (0,0,0)
mesh_rotation = (90,0,0)
mesh_scale = (1,1,1)
mesh = bt.readMesh(path_to_mesh,mesh_location,mesh_rotation,mesh_scale)

# add camera
cam_location = (2.5,-5,1)
cam_rotation = (75,0,25)
cam = bt.setCamera_from_UI(cam_location,cam_rotation)

# save to blend file
save_path = this_file_path + '/test.blend'
bpy.ops.wm.save_mainfile(filepath=save_path)
Render with command line
Alright! We have an object and a camera: that’s the minimal set we need to render a picture. We can do it with one last line of code:
image_path = this_file_path + '/image.png'
bt.renderImage(image_path, cam)
such that our full render.py looks like this:
# boring imports
import sys, os, bpy, bmesh
import numpy as np
this_file_path = os.path.dirname(__file__)
sys.path.append(os.path.join(this_file_path,'BlenderToolbox'))
import BlenderToolBox as bt

# initialize shape
mult = 5 # make this 1-5 for fast, 10-15 for final paper
resolution_x = 100*mult
resolution_y = 100*mult
numSamples = 100*mult # no need to understand what this does yet
bt.blenderInit(resolution_x,resolution_y,numSamples=numSamples)

# read mesh
path_to_mesh = this_file_path + '/dog.obj'
mesh_location = (0,0,0)
mesh_rotation = (90,0,0)
mesh_scale = (1,1,1)
mesh = bt.readMesh(path_to_mesh,mesh_location,mesh_rotation,mesh_scale)

# add camera
cam_location = (2.5,-5,1)
cam_rotation = (75,0,25)
cam = bt.setCamera_from_UI(cam_location,cam_rotation)

# render
image_path = this_file_path + '/image.png'
bt.renderImage(image_path, cam)

# save to blend file
save_path = this_file_path + '/test.blend'
bpy.ops.wm.save_mainfile(filepath=save_path)
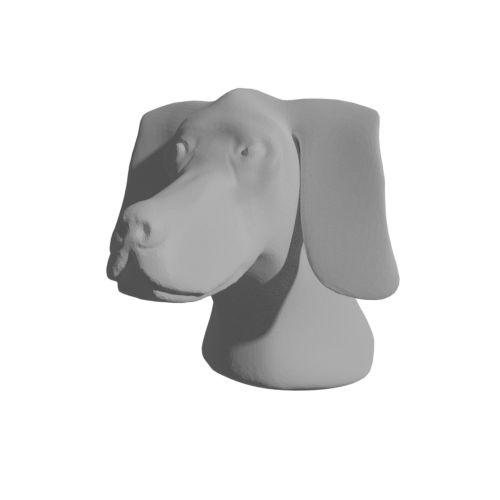
If we now run blender-python render.py, we will get a new image in our
directory
dir/
└── BlenderToolbox/
└── render.py
└── test.blend
└── dog.obj
└── image.png
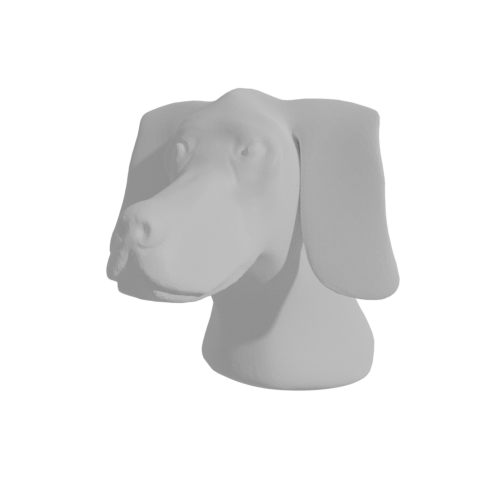
which, for now, looks like this (generated with mult=5):

It is very dark! And the reason is obvious: we have not added any lights yet. Let’s do just that.
Lights: ambient, sun, three point
The Blender Toolbox gives us many different lighting options. For example, the simplest light one can add is a sun:
light = bt.setLight_sun((45,45,45),1.0) # 45 is the angle, 1.0 is the brightness
A sunlight generally results in very sharp shadows:
Sharp shadows can be very aesthetically pleasing; however, they are generally not recommended for our research purposes, since they the shaded areas are so dark that they obscure the shape’s geometric detail. A way of getting around this is to add a soft ambient light, which adds brightness to every part of the scene to avoid extremely dark areas:
light = bt.setLight_sun((45,45,45),1.0)
bt.setLight_ambient(color=(0.2,0.2,0.2,1.0)) # 0.2 is the "strength" (from 0:black to 1:white)
This is the rendered output we get:
As expected, an ambient light avoids the extremely dark areas of the object, but it does so at the cost of over-lighting the areas that were exposed to the sun light, washing over some of the geometric detail.
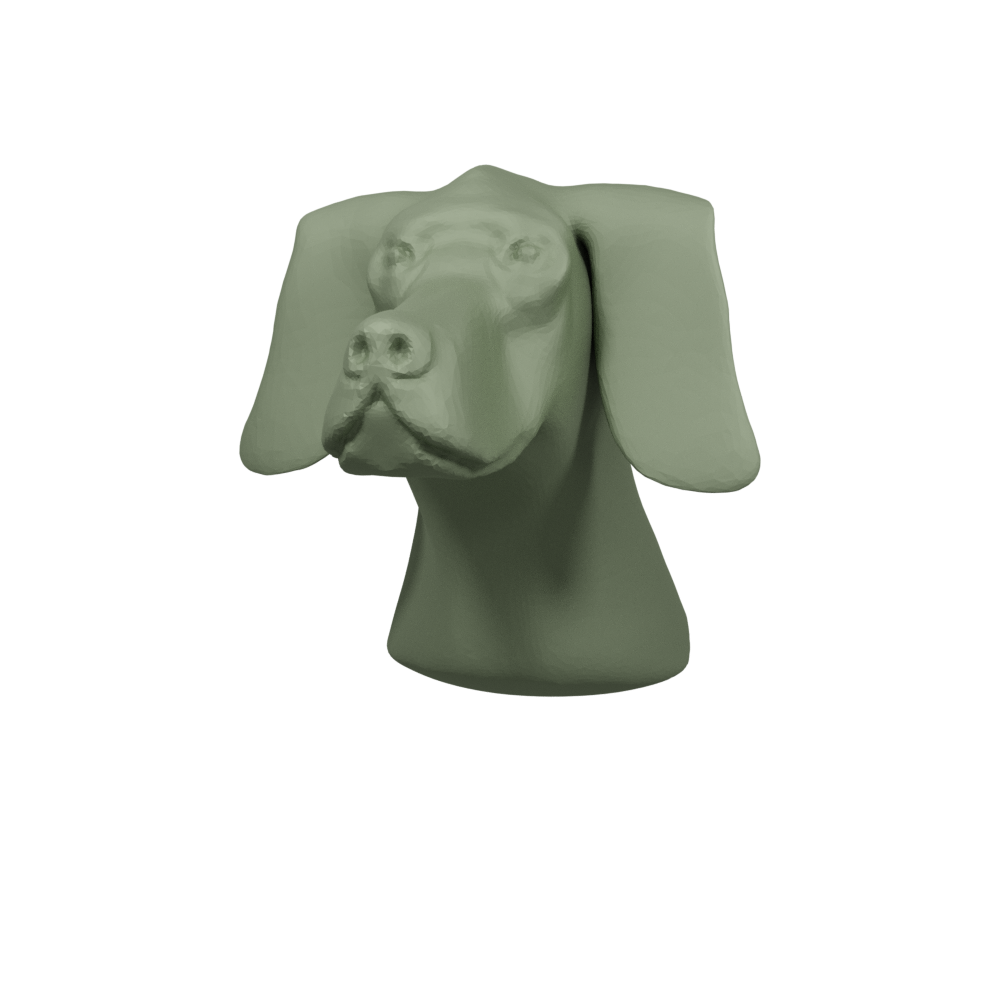
A better choice for a lighting setup is the classic photographic technique called three point lighting, which we can also fortunately use with the Blender Toolbox:
bt.setLight_threePoints(radius=10,height=10) # parameters are intuitive, but it's worth fine-tuning
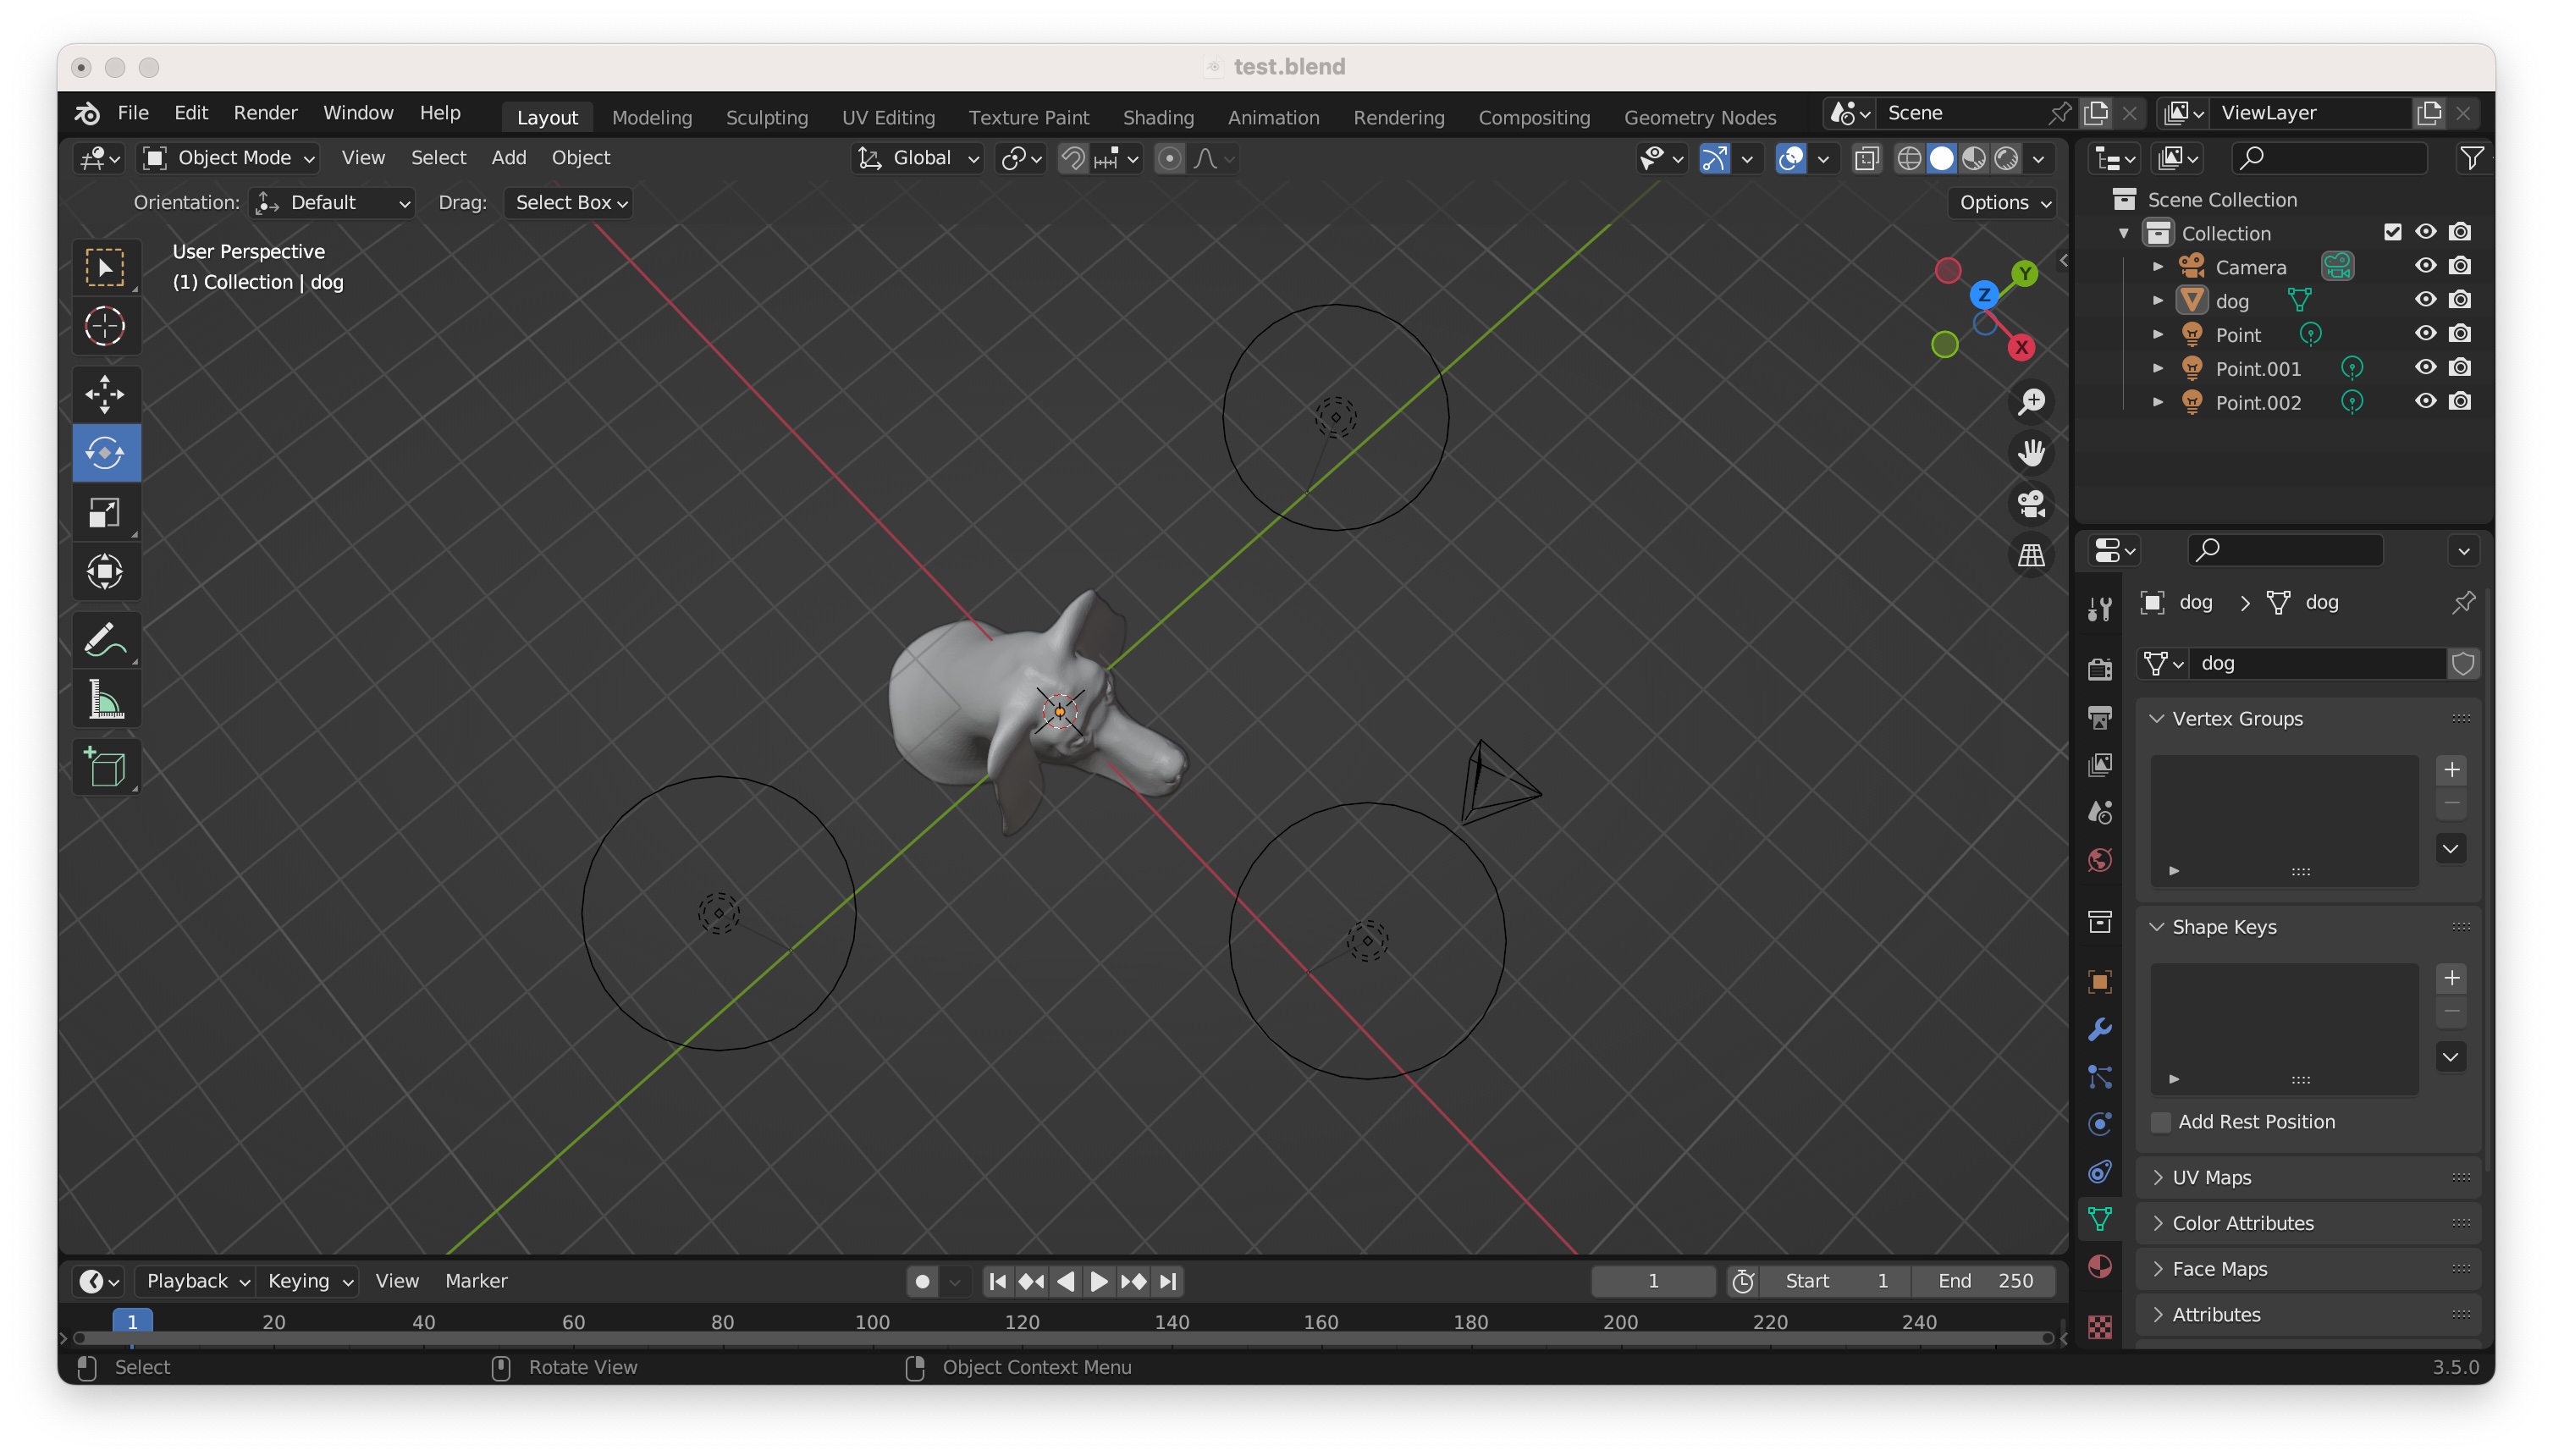
If we now open the generated blend file, we see something like this, with the
three point lights of differing intensities:
In a proper three-point lighting setup, the camera is near the strongest light, slightly angled towards the second strongest light. This orientation is a key part of why this lighting setup works, so we will need to change the position of the camera and object accordingly:
Our render.py thus looks like this:
# boring imports
import sys, os, bpy, bmesh
import numpy as np
this_file_path = os.path.dirname(__file__)
sys.path.append(os.path.join(this_file_path,'BlenderToolbox'))
import BlenderToolBox as bt

# initialize shape
mult = 5 # make this 1-5 for fast, 10-15 for final paper
resolution_x = 100*mult
resolution_y = 100*mult
numSamples = 100*mult # no need to understand what this does yet
bt.blenderInit(resolution_x,resolution_y,numSamples=numSamples)

# read mesh
path_to_mesh = this_file_path + '/dog.obj'
mesh_location = (0,0,0)
mesh_rotation = (90,0,110)
mesh_scale = (1,1,1)
mesh = bt.readMesh(path_to_mesh,mesh_location,mesh_rotation,mesh_scale)

# add camera
cam_location = (5.5,4,0.25)
cam_rotation = (80,0,125)
cam = bt.setCamera_from_UI(cam_location,cam_rotation)

# add light
# light = bt.setLight_sun((45,45,45),1.0)
bt.setLight_threePoints(radius=10,height=10)
bt.setLight_ambient(color=(0.05,0.05,0.05,1.0)) # 0.05 is the "strength" (from 0:black to 1:white)

# render
image_path = this_file_path + '/image.png'
bt.renderImage(image_path, cam)

# save to blend file
save_path = this_file_path + '/test.blend'
bpy.ops.wm.save_mainfile(filepath=save_path)
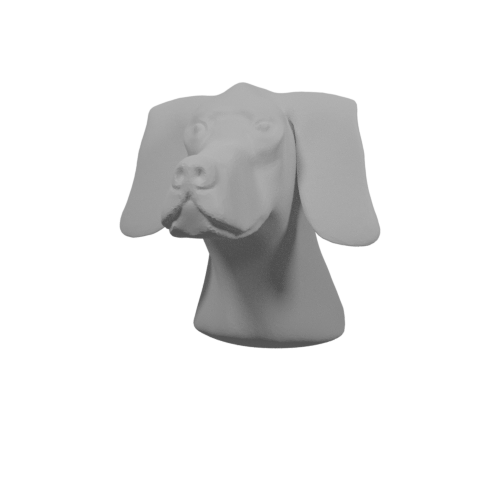
and produces a much more satisfying shape:
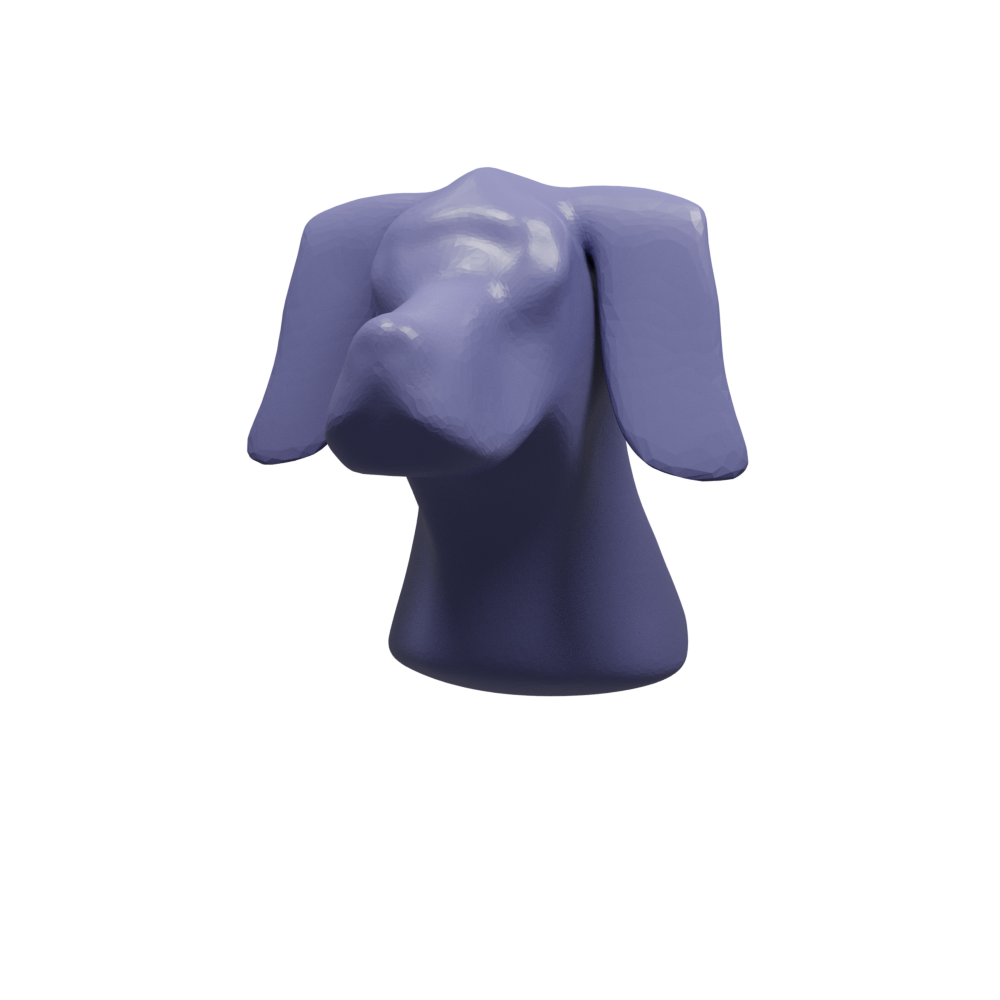
Material: color, singlecolor material, plastic, transparent, metal, glass, honey
Okay! We’re getting somewhere. The only essential step left is to give our shape a nice material, so that it does not look like it is made out of grey chalk. The Blender Toolbox shines at making it easy to add amazing-looking materials. The specifics will depend on each material but, broadly speaking, applying a material works in two steps: first, defining the color (e.g, “blue”) and, second, assinging the mesh a material with said color (e.g., “blue plastic”).
The first part is common to most materials:
mesh_rgba = (178.0/255.0,223.0/255.0,138.0/255.0,1.0) # rgba
mesh_color = bt.colorObj(mesh_rgba) # "blender" color
The second part, for a plastic material, looks like this (make sure to have this
code execute after mesh has been imported):
bt.setMat_plastic(mesh,mesh_color)
If we add these lines to render.py, which would then look like this:
# boring imports
import sys, os, bpy, bmesh
import numpy as np
this_file_path = os.path.dirname(__file__)
sys.path.append(os.path.join(this_file_path,'BlenderToolbox'))
import BlenderToolBox as bt

# initialize shape
mult = 10 # make this 1-5 for fast, 10-15 for final paper
resolution_x = 100*mult
resolution_y = 100*mult
numSamples = 100*mult # no need to understand what this does yet
bt.blenderInit(resolution_x,resolution_y,numSamples=numSamples)

# read mesh
path_to_mesh = this_file_path + '/dog.obj'
mesh_location = (0,0,0)
mesh_rotation = (90,0,110)
mesh_scale = (1,1,1)
mesh = bt.readMesh(path_to_mesh,mesh_location,mesh_rotation,mesh_scale)

# material
mesh_rgba = (178.0/255.0,223.0/255.0,138.0/255.0,1.0) # rgba
mesh_color = bt.colorObj(mesh_rgba) # "blender" color
bt.setMat_plastic(mesh,mesh_color)

# add camera
cam_location = (5.5,4,0.25)
cam_rotation = (80,0,125)
cam = bt.setCamera_from_UI(cam_location,cam_rotation)

# add light
# light = bt.setLight_sun((45,45,45),1.0)
bt.setLight_threePoints(radius=10,height=10)
bt.setLight_ambient(color=(0.05,0.05,0.05,1.0)) # 0.05 is the "strength" (from 0:black to 1:white)

# render
image_path = this_file_path + '/image.png'
bt.renderImage(image_path, cam)

# save to blend file
save_path = this_file_path + '/test.blend'
bpy.ops.wm.save_mainfile(filepath=save_path)
we produce this rendered image (now using mult=10 to appreciate more nuanced
distinctions):

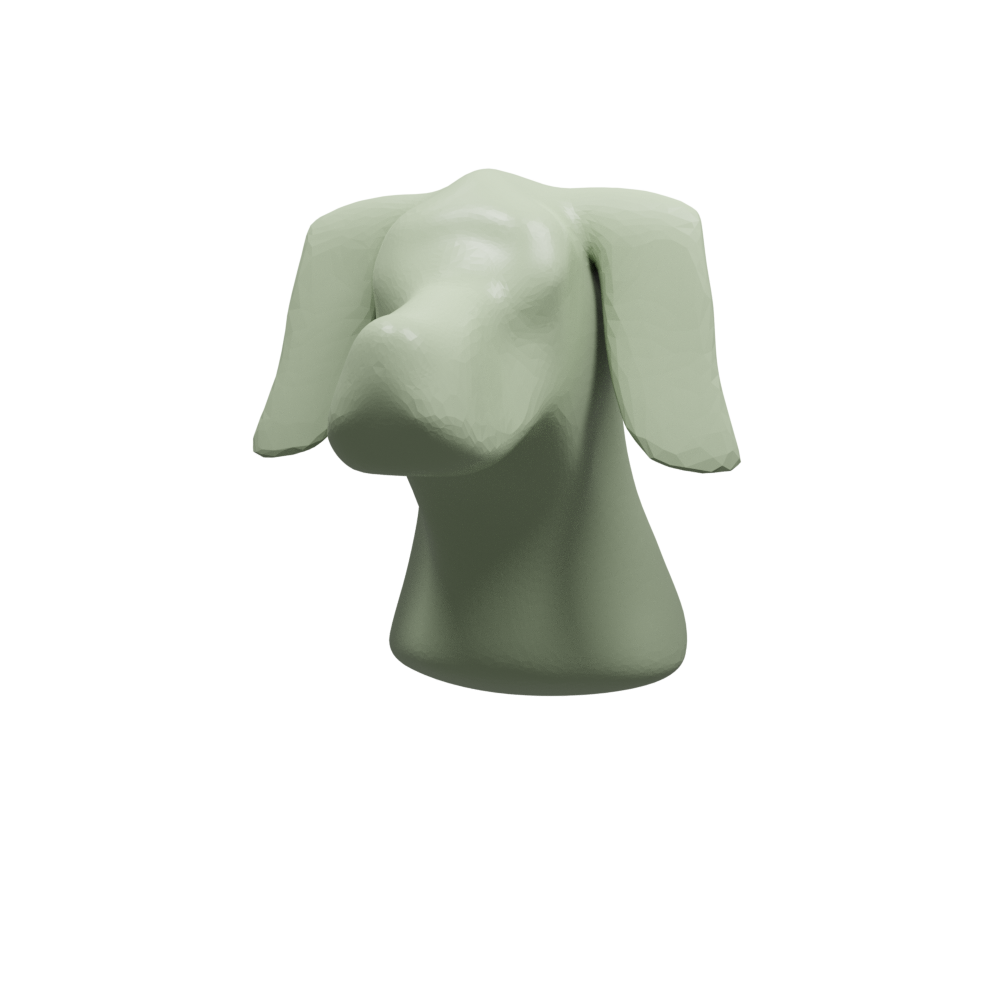
There are many other materials supported by BlenderToolbox. My favourite one is
singleColor, which one can obtain with
AO = 1.0 # ambient occlusion
bt.setMat_singleColor(mesh,mesh_color,AO)
and looks like this:
I know. Beautiful. Gracious.
Unfortunately, there seems to be some compatibility issue with this function and the newest version of Blender; therefore, you may encounter an error if attempting to run the above (I generally recommend using Blender 3.0 precisely because of this).
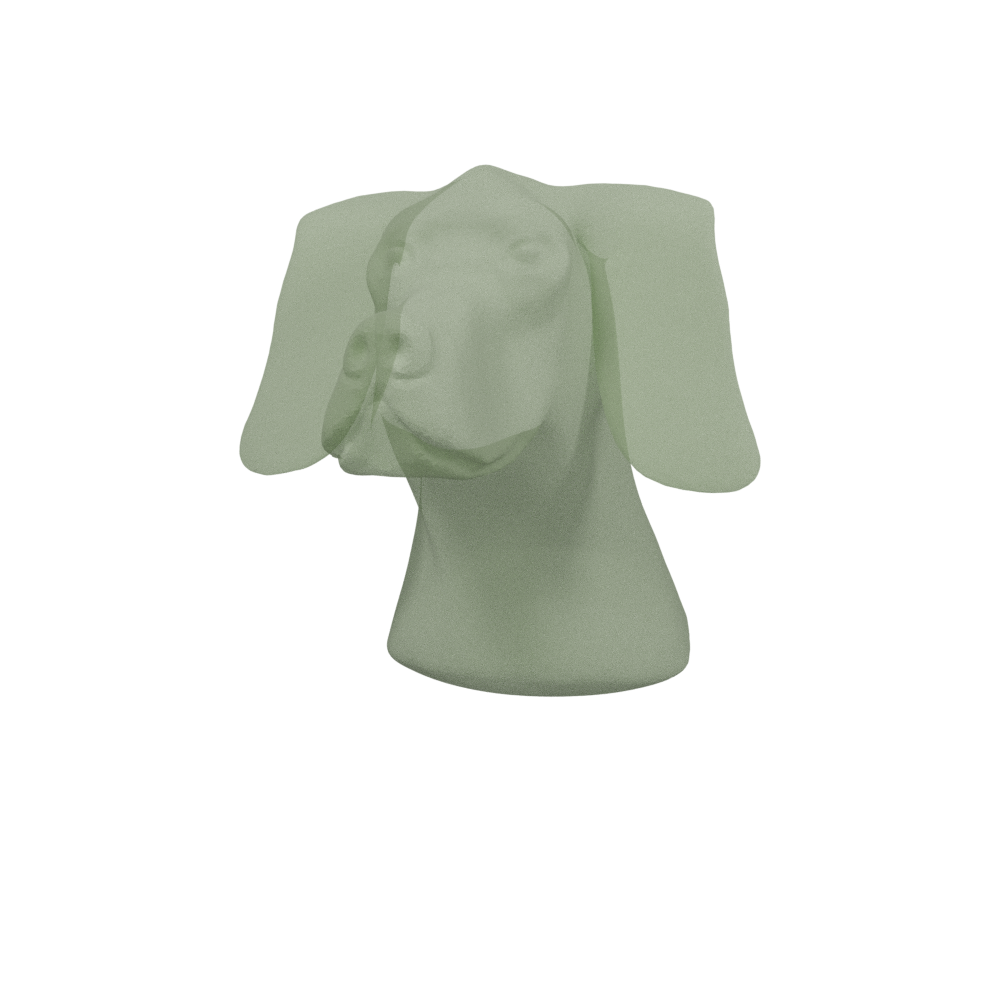
There are other useful materials; for example, one I use a lot is the
transparent one:
bt.setMat_transparent(mesh, mesh_color, 0.5, 0.2)
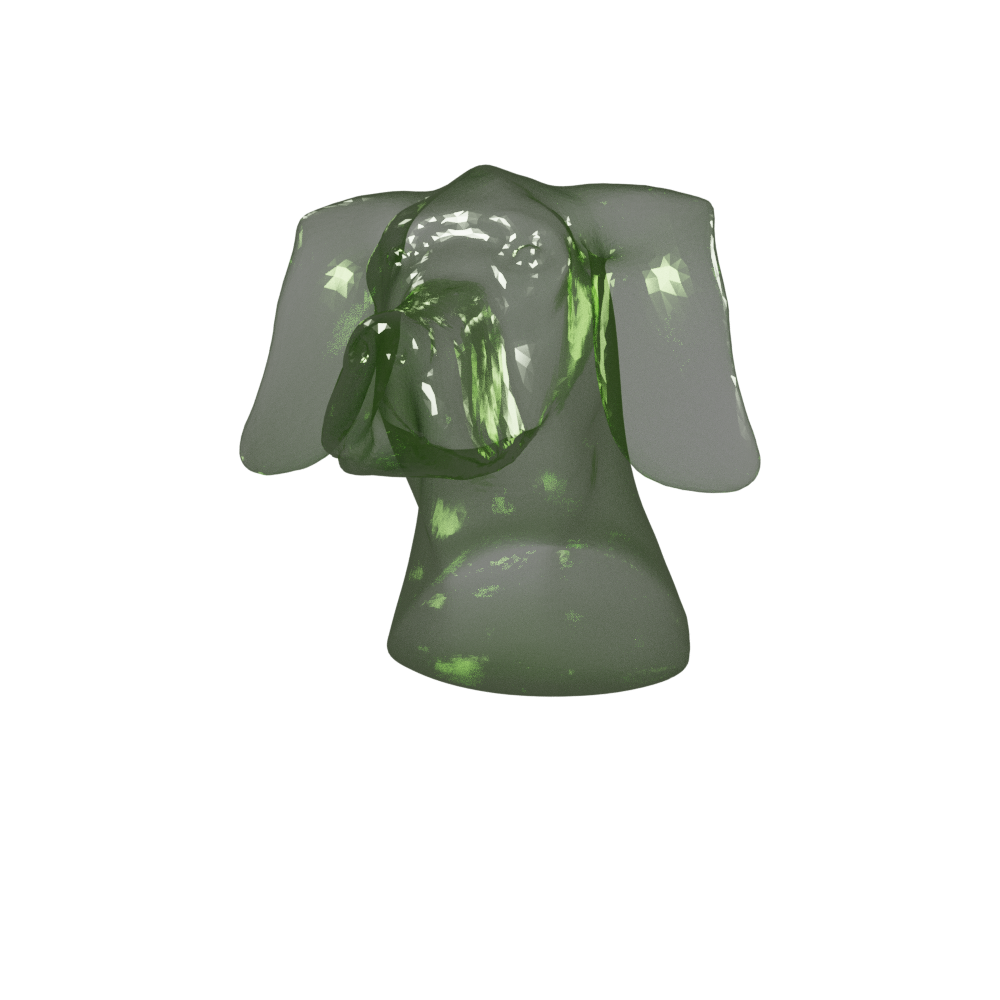
metal is also very cool:
AO = 1.0 # ambient occlusion
bt.setMat_metal(mesh, mesh_color, AO, 0.9)
and glass:
bt.setMat_glass(mesh, mesh_color,0.1)
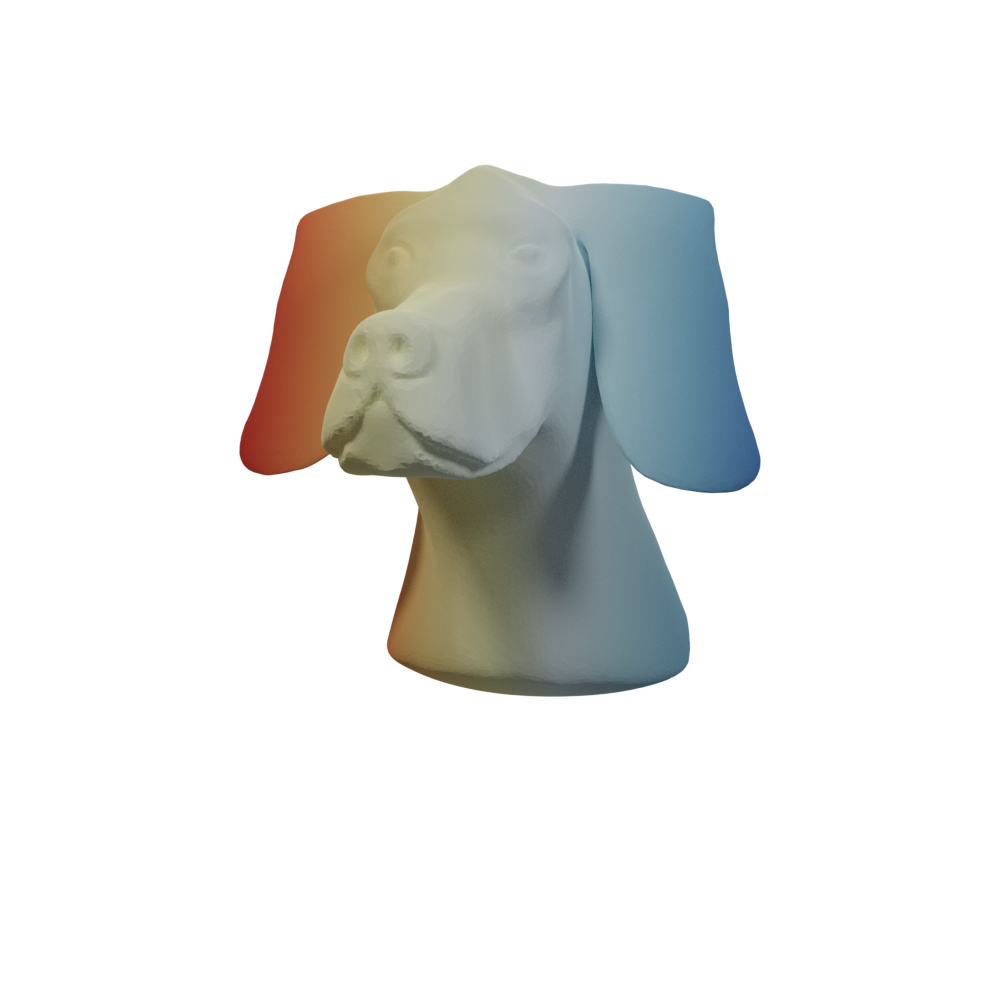
Vertex values
Often, we don’t just want to render a shape with a single color, but we want to use colors to convey some scalar information defined on each vertex or face of the object. This is a very common situation, which one can also render using the Blender Toolbox.
Let’s open a new file, scalar_data.py,
dir/
└── BlenderToolbox/
└── render.py
└── scalar_data.py
└── test.blend
└── dog.obj
└── image.png
and use it to write some simple per-vertex data on our mesh and save it to a
numpy file (you may need to pip install gpytoolbox):
import gpytoolbox
import numpy as np

v, f = gpytoolbox.read_mesh('dog.obj')
vertex_data = v[:,0]
np.save('vertex_data.npy',vertex_data)
Now, if we run python scalard_data.py (with your own python! not Blender’s!),
a new vertex_data.npy file should be generated:
dir/
└── BlenderToolbox/
└── render.py
└── scalar_data.py
└── vertex_data.npy
└── test.blend
└── dog.obj
└── image.png
In render.py, we can read this file to build a material with per-vertex
colors. The setup is slightly convoluted, but since we only really need it for
this specific use-case there isn’t much need to understand it at depth:
vertex_data = np.load('vertex_data.npy')
mesh = bt.setMeshScalars(mesh,vertex_data)
mesh_color_with_data = bt.colorObj([],0.5,1.0,1.0,0.0,0.0)
bt.setMat_VColor(mesh,mesh_color_with_data)
Our render.py would therefore look like
# boring imports
import sys, os, bpy, bmesh
import numpy as np
this_file_path = os.path.dirname(__file__)
sys.path.append(os.path.join(this_file_path,'BlenderToolbox'))
import BlenderToolBox as bt

# initialize shape
mult = 10 # make this 1-5 for fast, 10-15 for final paper
resolution_x = 100*mult
resolution_y = 100*mult
numSamples = 100*mult # no need to understand what this does yet
bt.blenderInit(resolution_x,resolution_y,numSamples=numSamples)

# read mesh
path_to_mesh = this_file_path + '/dog.obj'
mesh_location = (0,0,0)
mesh_rotation = (90,0,110)
mesh_scale = (1,1,1)
mesh = bt.readMesh(path_to_mesh,mesh_location,mesh_rotation,mesh_scale)

# material
# commented all the materials we tried
# # mesh_rgba = (178.0/255.0,223.0/255.0,138.0/255.0,1.0) # rgba
# # mesh_color = bt.colorObj(mesh_rgba) # "blender" color
# # bt.setMat_plastic(mesh,mesh_color)
# # AO = 1.0
# # bt.setMat_singleColor(mesh,mesh_color,AO)
# # bt.setMat_transparent(mesh, mesh_color, 0.5, 0.2)
# # AO = 1.0 # ambient occlusion
# # bt.setMat_metal(mesh, mesh_color, AO, 0.9)
# # bt.setMat_glass(mesh, mesh_color,0.1)
# per-vertex colors
vertex_data = np.load('vertex_data.npy')
mesh = bt.setMeshScalars(mesh,vertex_data)
mesh_color_with_data = bt.colorObj([],0.5,1.0,1.0,0.0,0.0)
bt.setMat_VColor(mesh,mesh_color_with_data)

# add camera
cam_location = (5.5,4,0.25)
cam_rotation = (80,0,125)
cam = bt.setCamera_from_UI(cam_location,cam_rotation)

# add light
# light = bt.setLight_sun((45,45,45),1.0)
bt.setLight_threePoints(radius=10,height=10)
bt.setLight_ambient(color=(0.05,0.05,0.05,1.0)) # 0.05 is the "strength" (from 0:black to 1:white)

# render
image_path = this_file_path + '/image.png'
bt.renderImage(image_path, cam)

# save to blend file
save_path = this_file_path + '/test.blend'
bpy.ops.wm.save_mainfile(filepath=save_path)
and produce this:
Rendering-specific python module
We iterated a lot and tried many different things to converge on a good rendering style that we like. Using scripts instead of the blender GUI means that we can now amortize all that work and save our choices in a way that’s consistent across all our paper figures. To do this, I like to use a directory structure like this:
dir/
└── BlenderToolbox/
└── render_utility/
└─────── __init__.py
└─────── misc.py
└── render.py
└── scalar_data.py
└── vertex_data.npy
└── test.blend
└── dog.obj
└── image.png
Here’s what render_utility/__init__.py looks like (this is just a file that
tells python that this is a module):
from .misc import *
and, on the other hand, here’s what misc.py can look like, containing all our
general rendering functionality:
# basic imports
import sys, os
# blender toolbox
sys.path.append(os.path.join(os.path.dirname(__file__), '..', 'BlenderToolbox'))
import BlenderToolBox as bt
# base blender python functionality
import bpy
import numpy as np

# cbrewer
hardred = (228.0/255, 26.0/255, 28.0/255, 1.0)
hardblue = (55.0/255, 126.0/255, 184.0/255, 1.0) # blue
hardgreen = (77.0/255, 175.0/255, 74.0/255, 1.0) # green
hardpurple = (152.0/255, 78.0/255, 163.0/255, 1.0) # purple
hardorange = (255.0/255, 127.0/255, 0.0/255, 1.0) # orange
hardyellow = (255.0/255, 255.0/255, 51.0/255, 1.0) # yellow
hardbrown = (166.0/255, 86.0/255, 40.0/255, 1.0) # brown
hardpink = (247.0/255, 129.0/255, 191.0/255, 1.0) # pink
grey = (128.0/255, 128.0/255, 128.0/255, 1.0) # grey
softblue = (191.0/255, 211.0/255, 230.0/255, 1.0) # light blue

ourcolor = hardgreen

def setup_scene(mult,cam_position,cam_rotation):
    resolution = 100*mult
    bt.blenderInit(resolution,resolution,numSamples=100*mult)
    cam = bt.setCamera_from_UI(cam_position,cam_rotation)
    bt.setLight_threePoints()
    bt.setLight_ambient(color=(0.05,0.05,0.05,1.0))
    return cam

def plot_our_mesh(path,rgba = ourcolor, location = (0,0,0), rotation = (90,0,110)):
    mesh = bt.readMesh(path,location,rotation,(1,1,1))
    mesh_color = bt.colorObj(rgba) # "blender" color
    bt.setMat_plastic(mesh,mesh_color)
    return mesh

def render_scene(image_path,cam):
    bt.renderImage(image_path, cam)
Then, our render.py can just be:
import os, sys
sys.path.append(os.path.dirname(__file__))
import render_utility

this_file_path = os.path.dirname(__file__)
path_to_mesh = this_file_path + '/dog.obj'
save_path = this_file_path + '/test.blend'
image_path = this_file_path + '/image.png'

cam = render_utility.setup_scene(10,(10,5,4),(70,0,110))
mesh = render_utility.plot_our_mesh(path_to_mesh)
render_utility.render_scene(image_path,cam)
Leveraging render-specific module to make a new figure
If, for example, I want to make a new script comparing three objs
(ours,
theirs and the
input) in comparison/,
dir/
└── BlenderToolbox/
└── render_utility/
└─────── __init__.py
└─────── misc.py
└── comparison/
└─────── ours.obj
└─────── input.obj
└─────── theirs.obj
└── render.py
└── scalar_data.py
└── vertex_data.npy
└── test.blend
└── dog.obj
└── image.png
all I need to add is a new render file called render_comparison.py:
import os, sys
sys.path.append(os.path.dirname(__file__))
import render_utility

this_file_path = os.path.dirname(__file__)
path_to_our_mesh = this_file_path + '/comparison/ours.obj'
path_to_their_mesh = this_file_path + '/comparison/theirs.obj'
path_to_input_mesh = this_file_path + '/comparison/input.obj'
our_image_path = this_file_path + '/ours_image.png'
input_image_path = this_file_path + '/input_image.png'
their_image_path = this_file_path + '/their_image.png'

def plot_input_mesh(path):
    return render_utility.plot_our_mesh(path,rgba=(0.5,0.5,0.5,1.0))

def plot_their_mesh(path):
    return render_utility.plot_our_mesh(path,rgba=(0.2,0.2,0.5,1.0))

cam_location = (5.5,4,0.25)
cam_rotation = (80,0,125)

# ours
cam = render_utility.setup_scene(2,cam_location,cam_rotation)
mesh = render_utility.plot_our_mesh(path_to_our_mesh)
render_utility.render_scene(our_image_path,cam)

# input
cam = render_utility.setup_scene(2,cam_location,cam_rotation)
mesh = plot_input_mesh(path_to_input_mesh)
render_utility.render_scene(input_image_path,cam)

# theirs
cam = render_utility.setup_scene(2,cam_location,cam_rotation)
mesh = plot_their_mesh(path_to_their_mesh)
render_utility.render_scene(their_image_path,cam)
Et voilà!

Point cloud
We only need to add this to misc.py:
def plot_point_cloud(path,radius=0.003,color=ourcolor,rotation=(90,0,0)):
    mesh = bt.readMesh(path, (0,0,0), rotation, scale=(1,1,1))
    # # set material
    ptColor = bt.colorObj(color, 0.5, 1.3, 1.0, 0.0, 0.0)
    ptSize = radius
    bt.setMat_pointCloud(mesh, ptColor, ptSize)
    return mesh